recycle material turkey centerpiece

Friendsgiving, Black Friday Eve, Thanksalotapalooza…. however you are celebrating, it is fun to pay tribute to the bird most associated with the fourth Thursday in November, though turkey may or may not have been on the menu for the storied meal shared by the Plymouth Colonists and Pilgrims and the Wampanoag people indigenous to the area. Novelist Sara Josepha Hale popularized the idea of turkey as the main dish for Thanksgiving in the 1820’s with a campaign to make Thanksgiving a national holiday. We are presenting a budget friendly turkey for the center of the table that even your vegan friends and family will approve. Raiding the recycling, we have put together a step by step for a life-size gobbler— no brining, no basting, and no baking required!
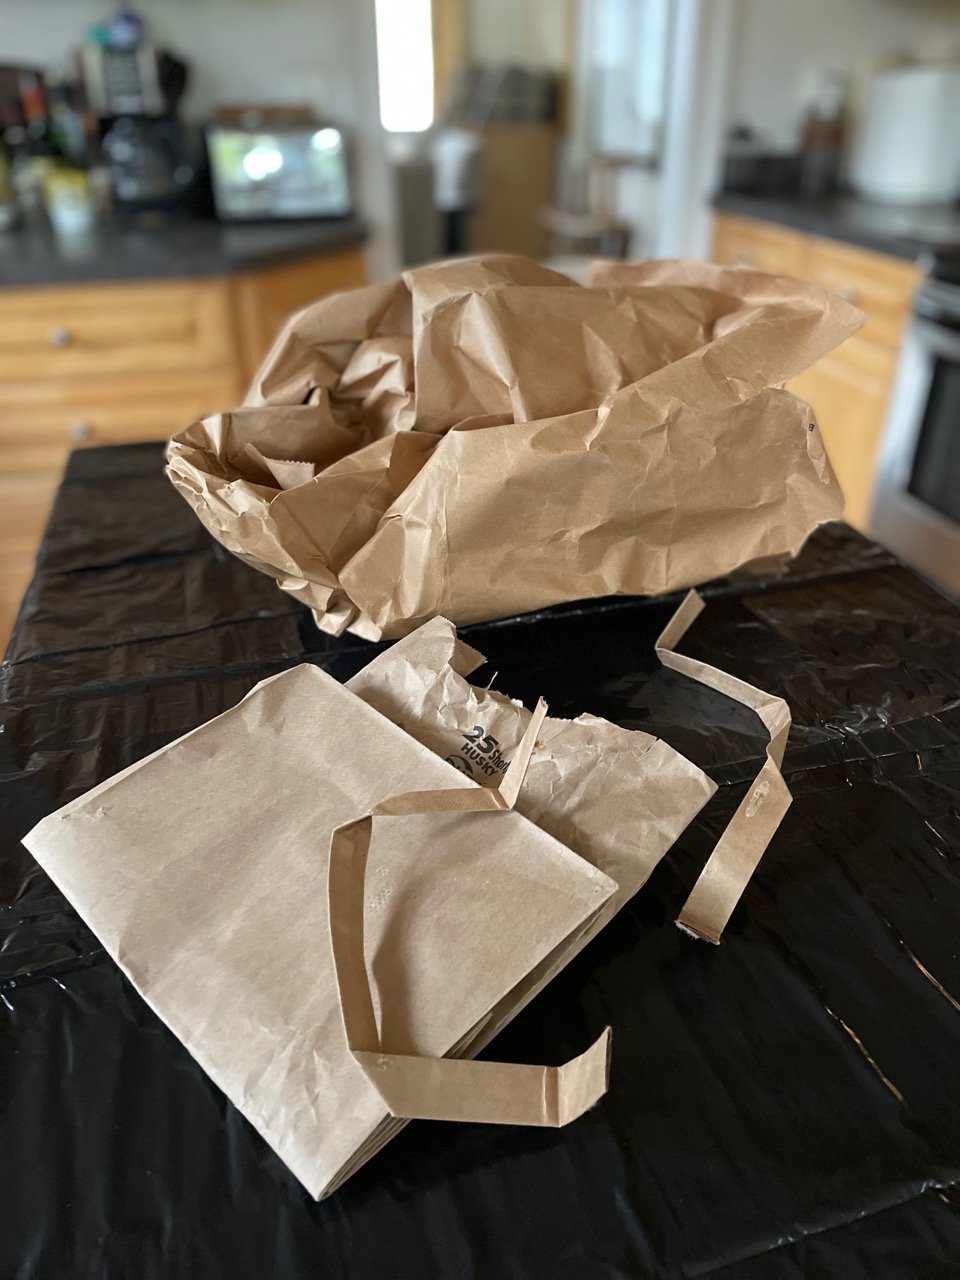
You will need 3-4 regular paper grocery bags, kraft paper or kraft paper used for packing, toilet paper rolls and/or paper towel rolls, tape, and glue. A stapler helps expedite the construction — can be used as temporary holds while glue dries and removed later or hidden inside paper folds.
Starting with a kraft paper grocery bag, turn it inside out if it has any printing and puff it out to form the basis of the turkey body.
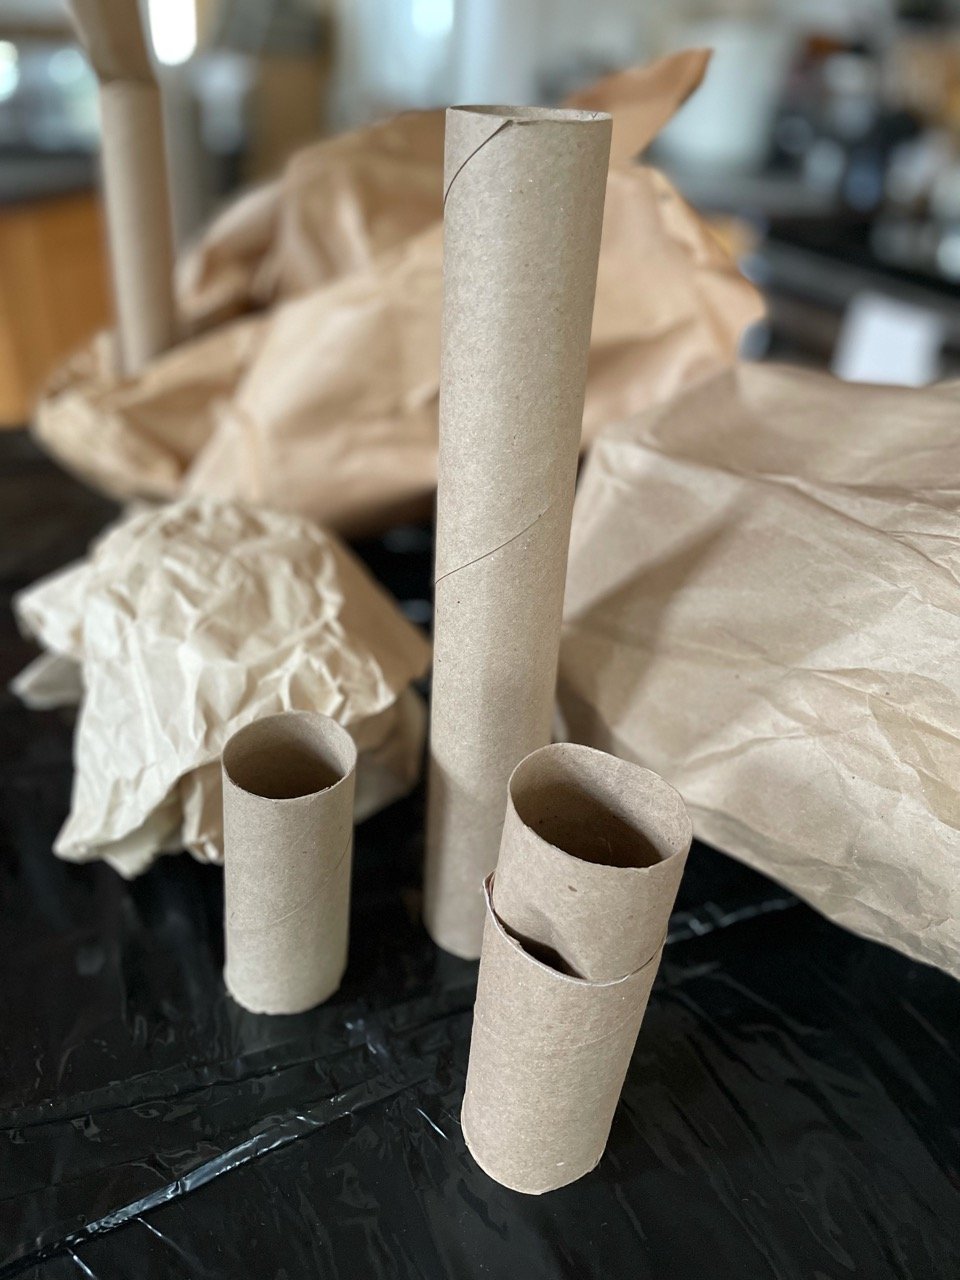
Using the paper towel rolls, scrunch the bottom of one to fit inside the body of another and another to form a support or armature for the turkey’s head and neck.

Checking length of the future tail against grocery bag body, cut to same length then accordion pleat or fold kraft paper or packing paper.

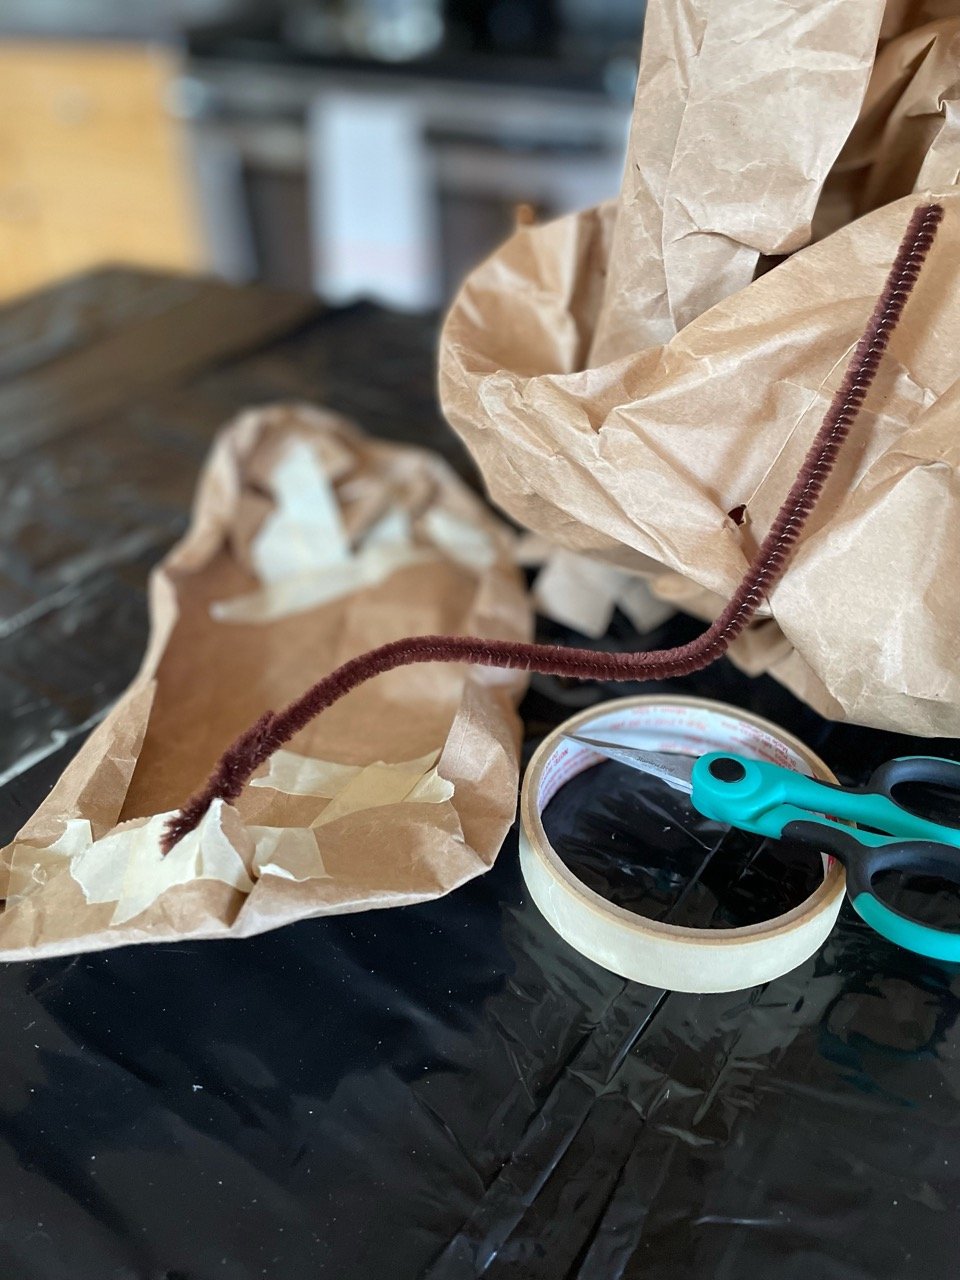
Gather pleated paper together tightly and secure with twine, string, or wire. We used a chenille stem.

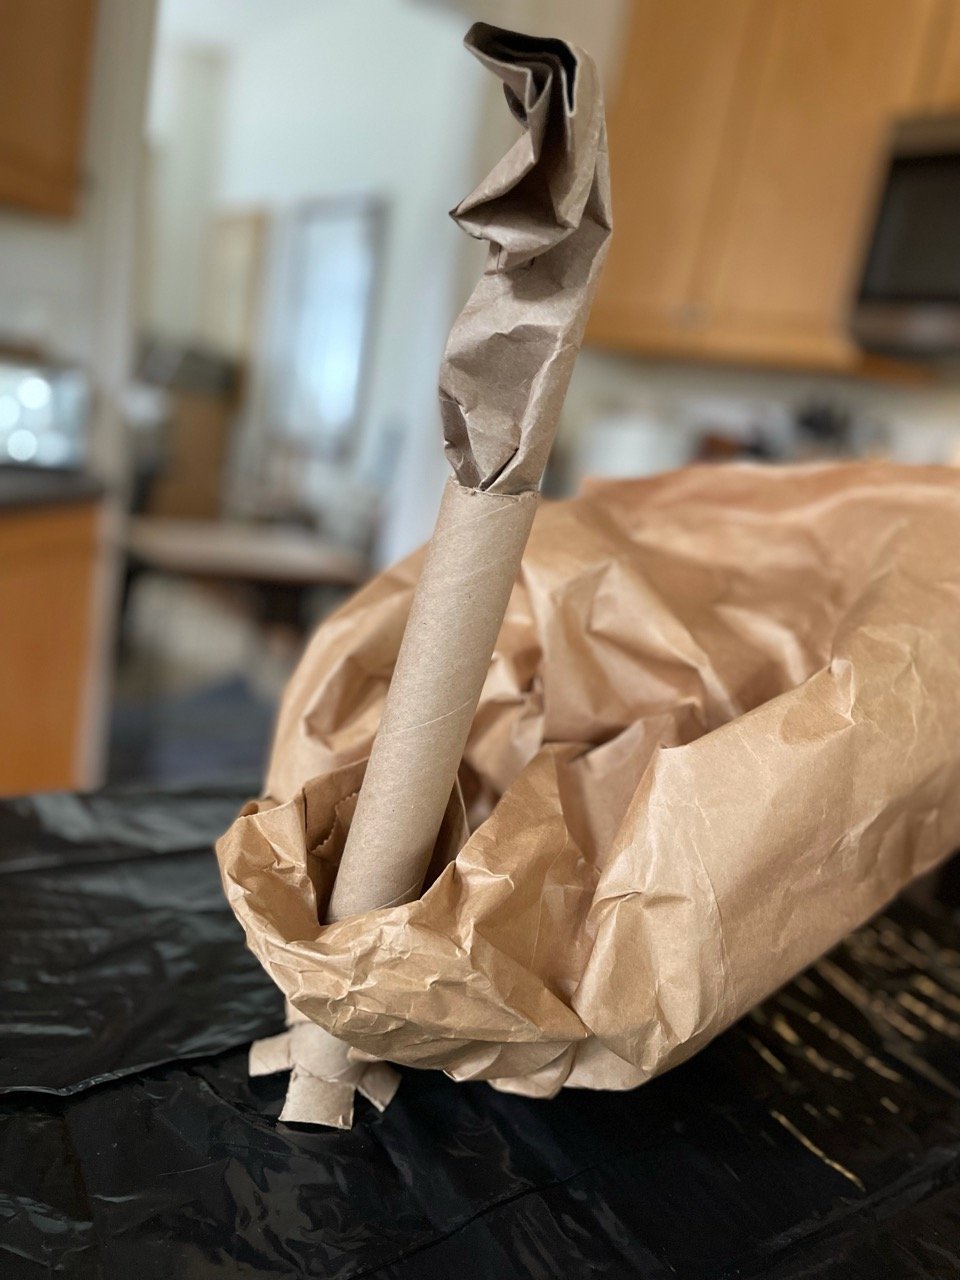
Create a hole in the front of the grocery bag turkey body just large enough to pass the paper roll neck/head assembly through. We split the bottom into four flaps and folded them outwards to provide more stability.
Cutting basic kraft grocery bags apart provides working material for wrapping the neck and head, crafting wings and stuffing the body.
We wrapped the neck assembly with kraft paper, leaving excess at the top to form the head. Crush shape the head into an almond shape with a pinched point to make a beak.
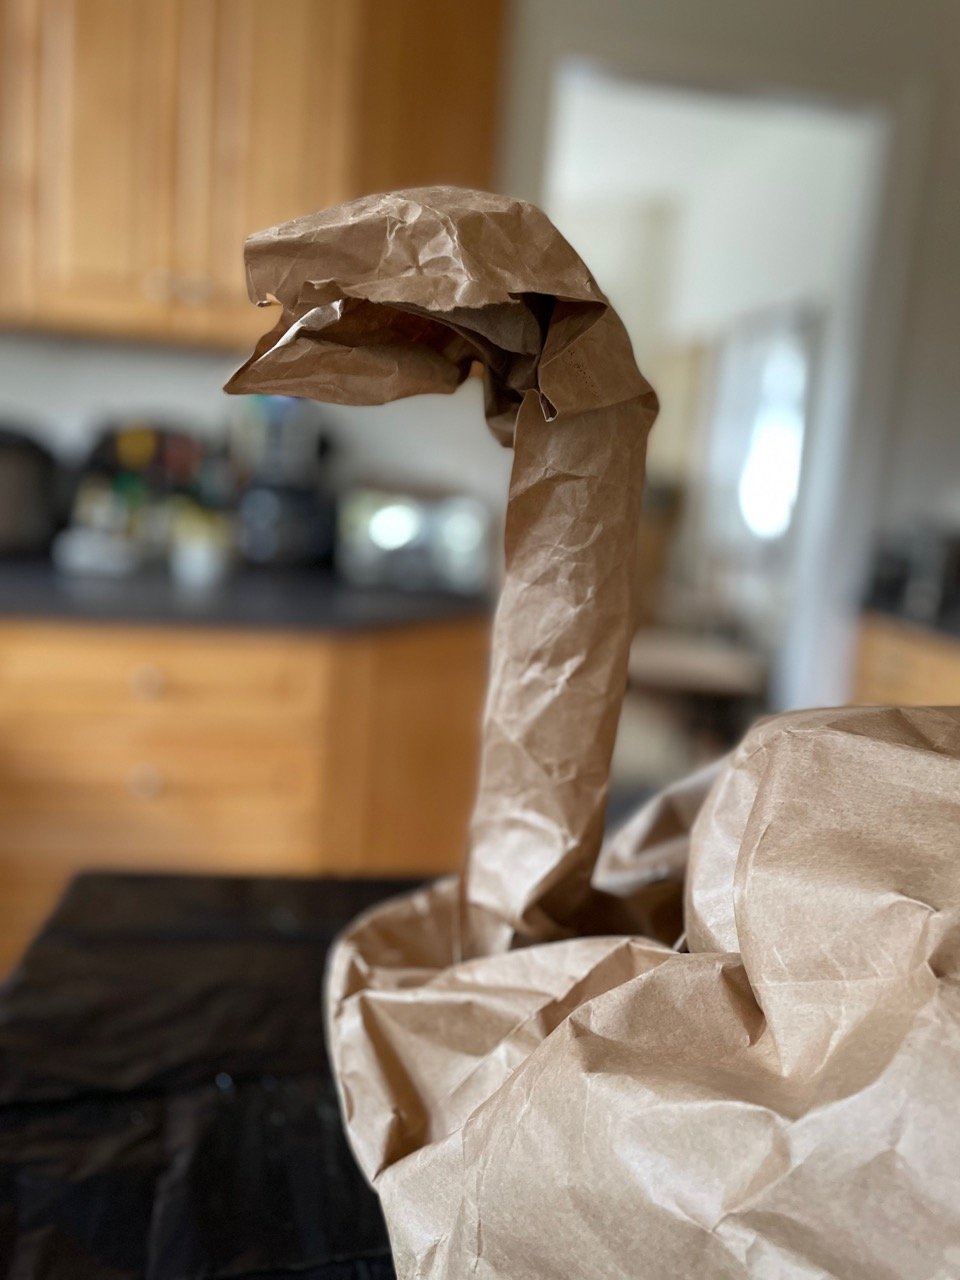
Once the head is in a basic bird shape, glue down folds in the paper to refine. We used chenille stems to stabilize the head until the glue dried.


Taking a cut out side of a kraft paper bag, crush curve the edges to form an oval to attach across the front of the turkey to build out the breast and help hide the mechanics of the paper tube at the bottom of the neck. Tape down the crush rolled edges of the oval. We reinforced spots on each edges of the oval, made an opening, and ran a chenille stem from side to side behind the paper roll neck so the wire can draw tight to be stable.
In the this photo, you can also see the twist of paper added, draped over the beak, to form the distinctive turkey wattle.

Turning to the rear of the turkey, we balled up heavy kraft paper give the body substance, and added pillars of toilet roll paper columns to increase stability in the interior.

Splay out the fans of the accordion pleated paper to form the tail. It helps the paper to stand to attach edges of individual fans together. We made two layers of paper fans so the tail is really full. We attached the tail with brass brads — but could have used tape or glue. As the tail stands by itself, it could be set behind the body sitting as a centerpiece without being attached.

Wings on turkeys are sort of useless, but as a design element on a centerpiece, they add a lot! We cut kraft grocery bags into wing shapes and add symmetrically matching sections imitating rows of feathers, gluing them one over the other. Before gluing, we folded the faux feathers down the center to add textural interest and a give a more featherlike appearance.


Once the layers of feathers were glued and the glue dry, we crushed rolled the outer edges of the wings— the non-feathered edges — to add dimension. We attached the wings with brass brads— but tape or glue works as well
(Hint: clothespins make great tools for softly holding paper edges while glue dries.)

Tom on the table showing the layers of paper added at the front to fill in any gaps, hide any mechanics or attachments and imitate a turkey’s feathered breast.
