


we are not just a one chick pony
We’ve been working around the cluck… ahem… to get some tutorials up for easy peasy spring decor. If you thought the pom poms could only be used one way? Yolks on you— Chick this out: same pom, different chicken.
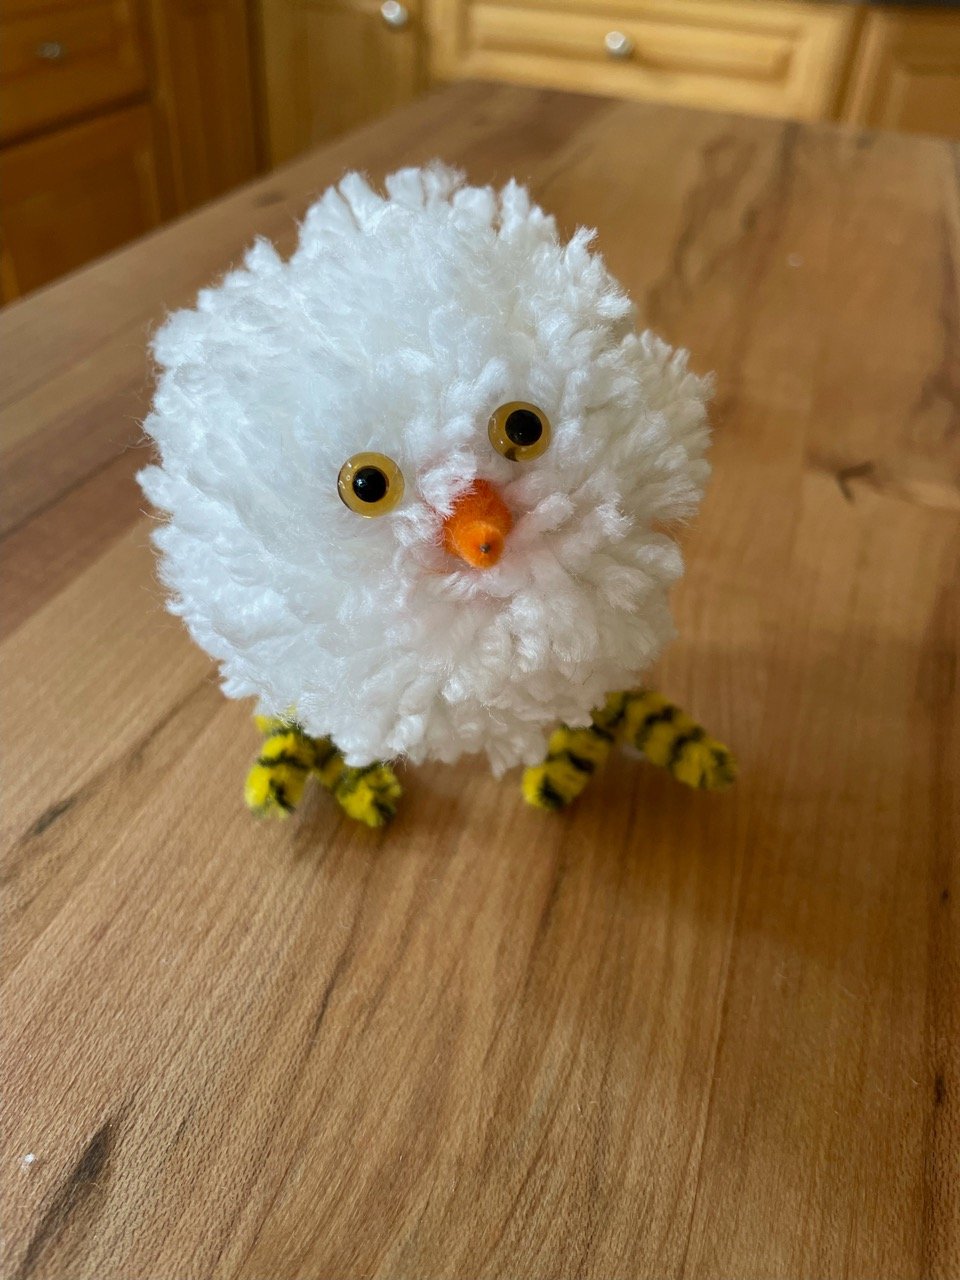
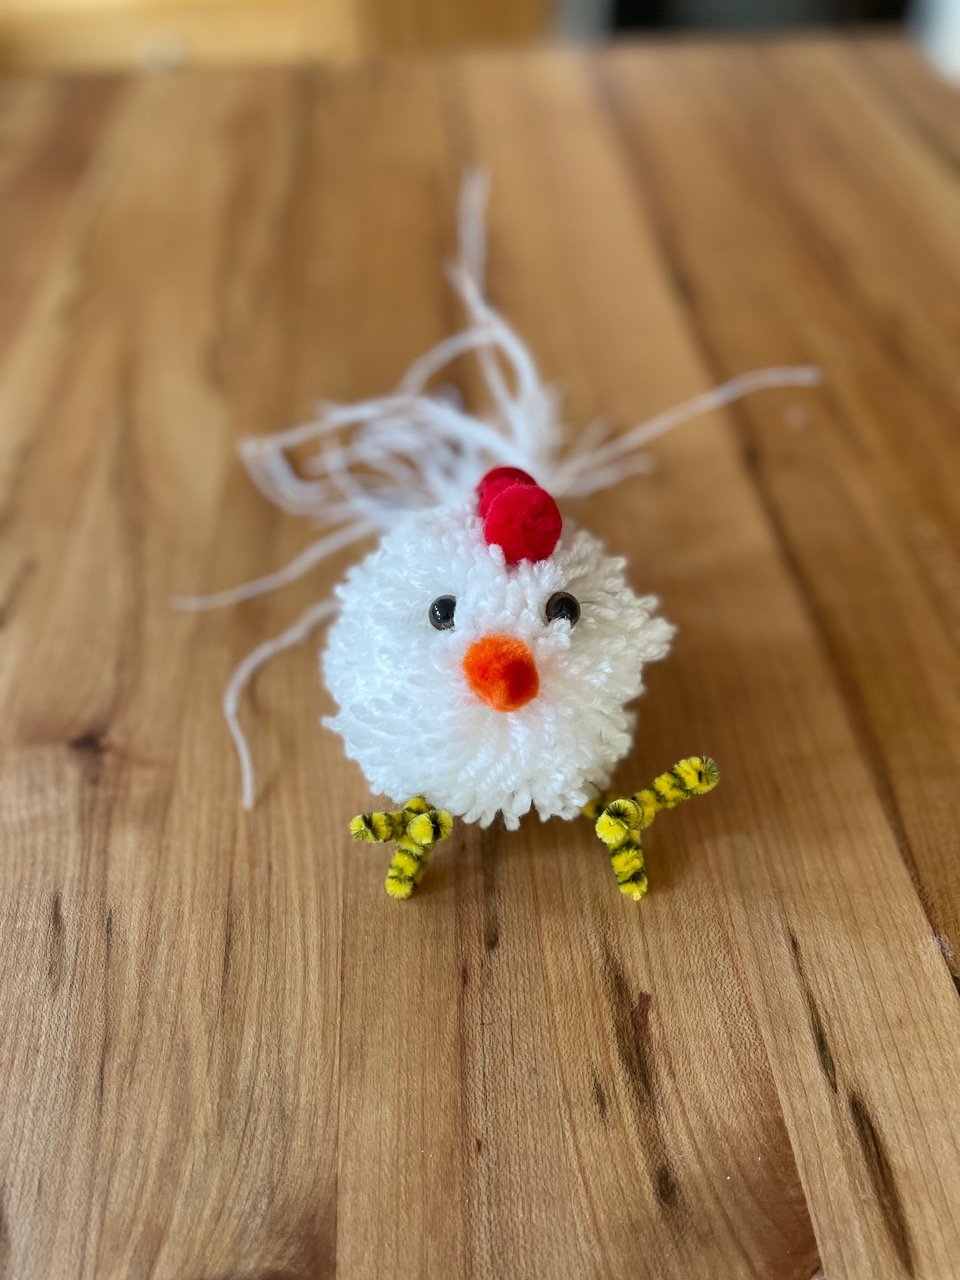
We used the same techniques as our spring chicken post. A store-bought or homemade yarn pom pom, eyes, a beak, then encircled with wire or chenille stems for legs and feet, embedded down in the fiber approximately halfway on the sphere, and made secure fairly tightly. A new twist on chicken legs!

Defying eggspectations, we changed it up and dyed the yarn chickie-yellow, using easy-to-hand food coloring. Hint: leave off gluing on eyes and beak until after the dyeing and drying process is complete.
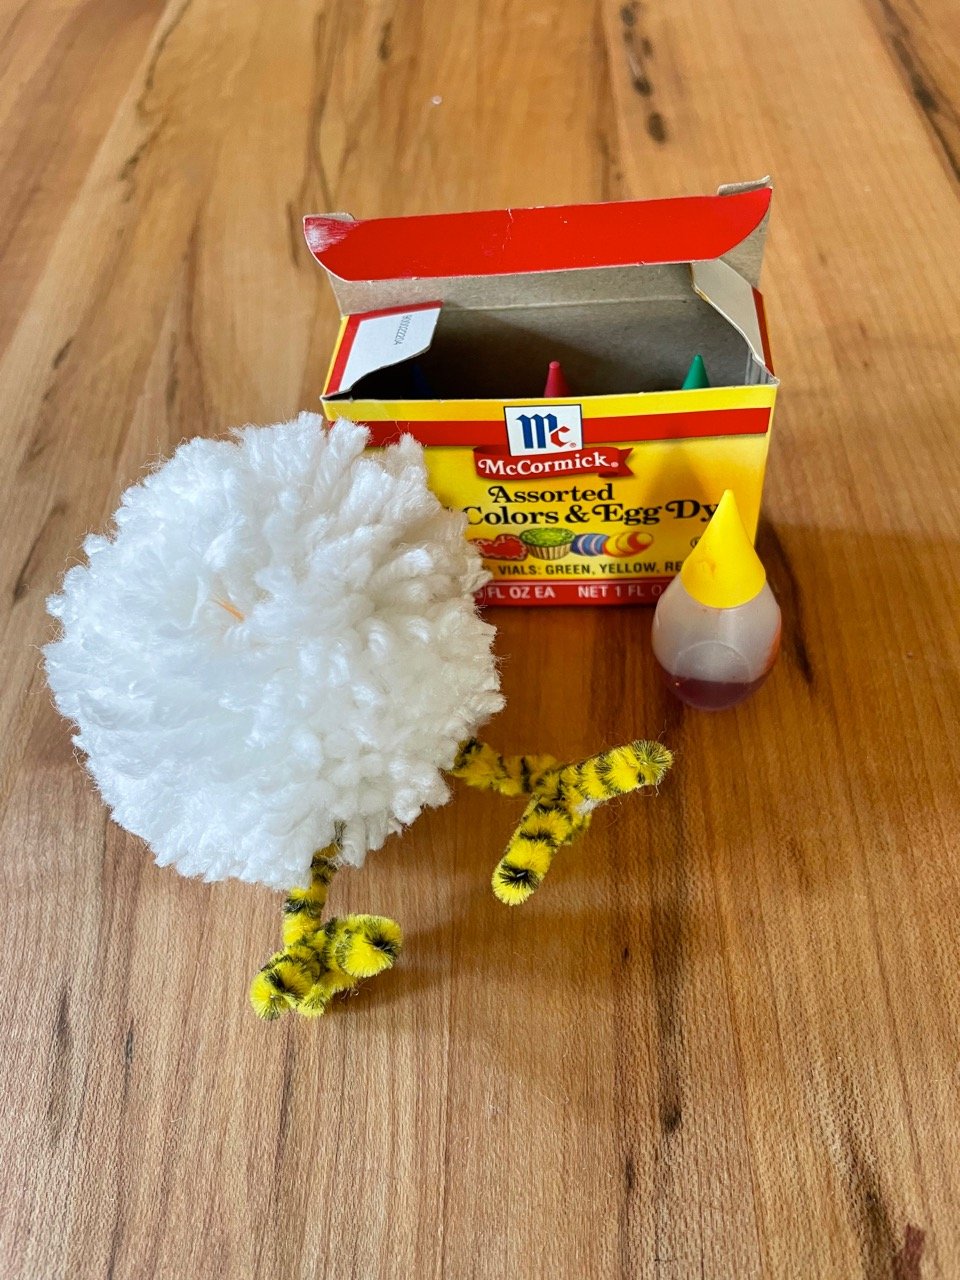
So we got up to our old chicks, covered our work surface, protected our clothes, and put on some plastic gloves in preparation for operation Tres Chic II…Hensome Lad: Son of a Biscuit.

We mixed yellow food coloring and water in a small bowl.
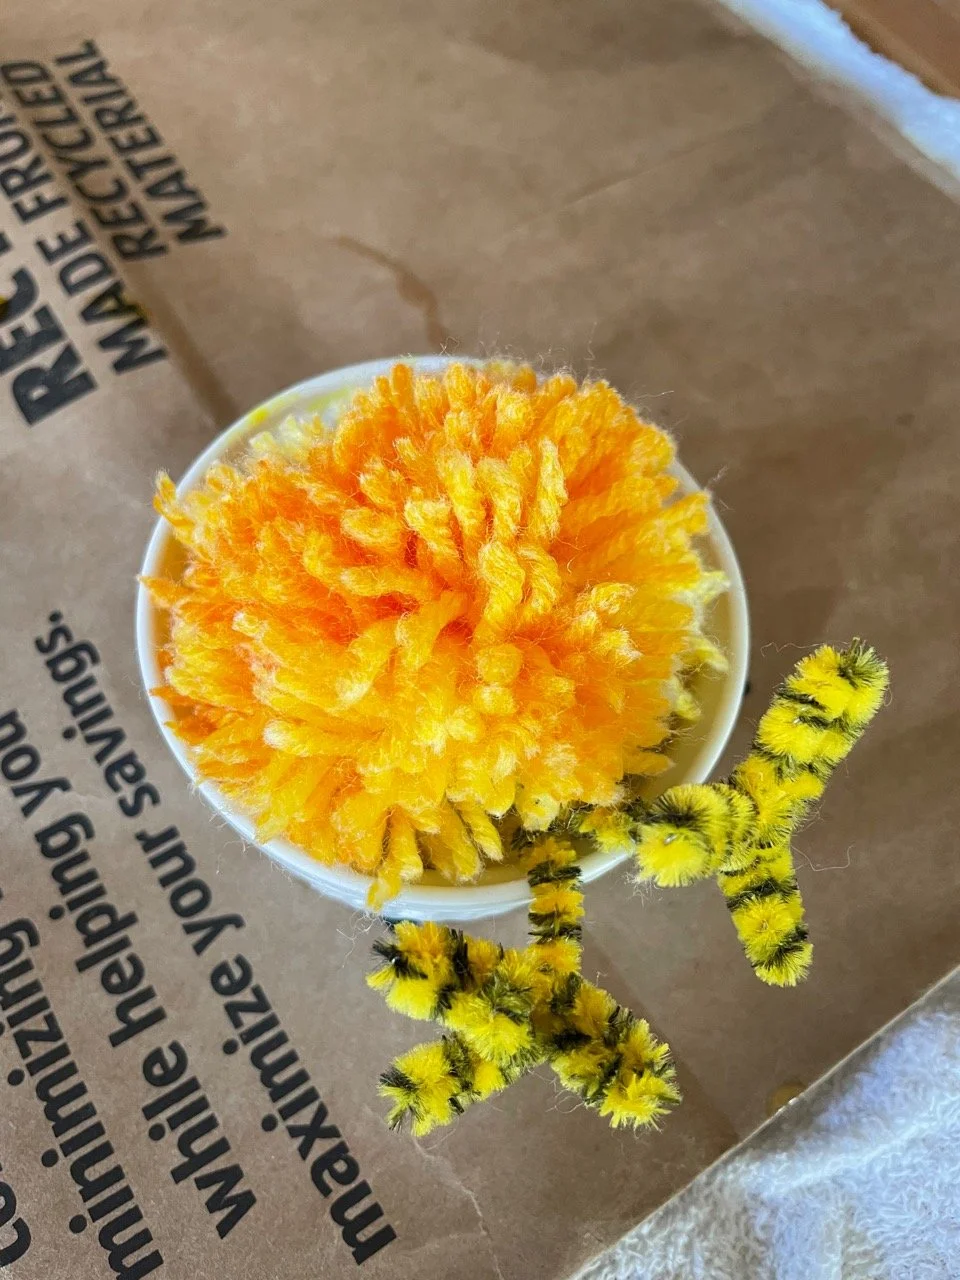
In a poultry amount of time, the yarn became saturated with dye by turning the pom a couple times. We rinsed the dyed pom in cool water, wrung it out carefully, then put it in the dryer with a couple old towels (the dye will come off until it is fully dry and set).

Trimming out some of the fiber to add some shaping, gives our chick some definition.

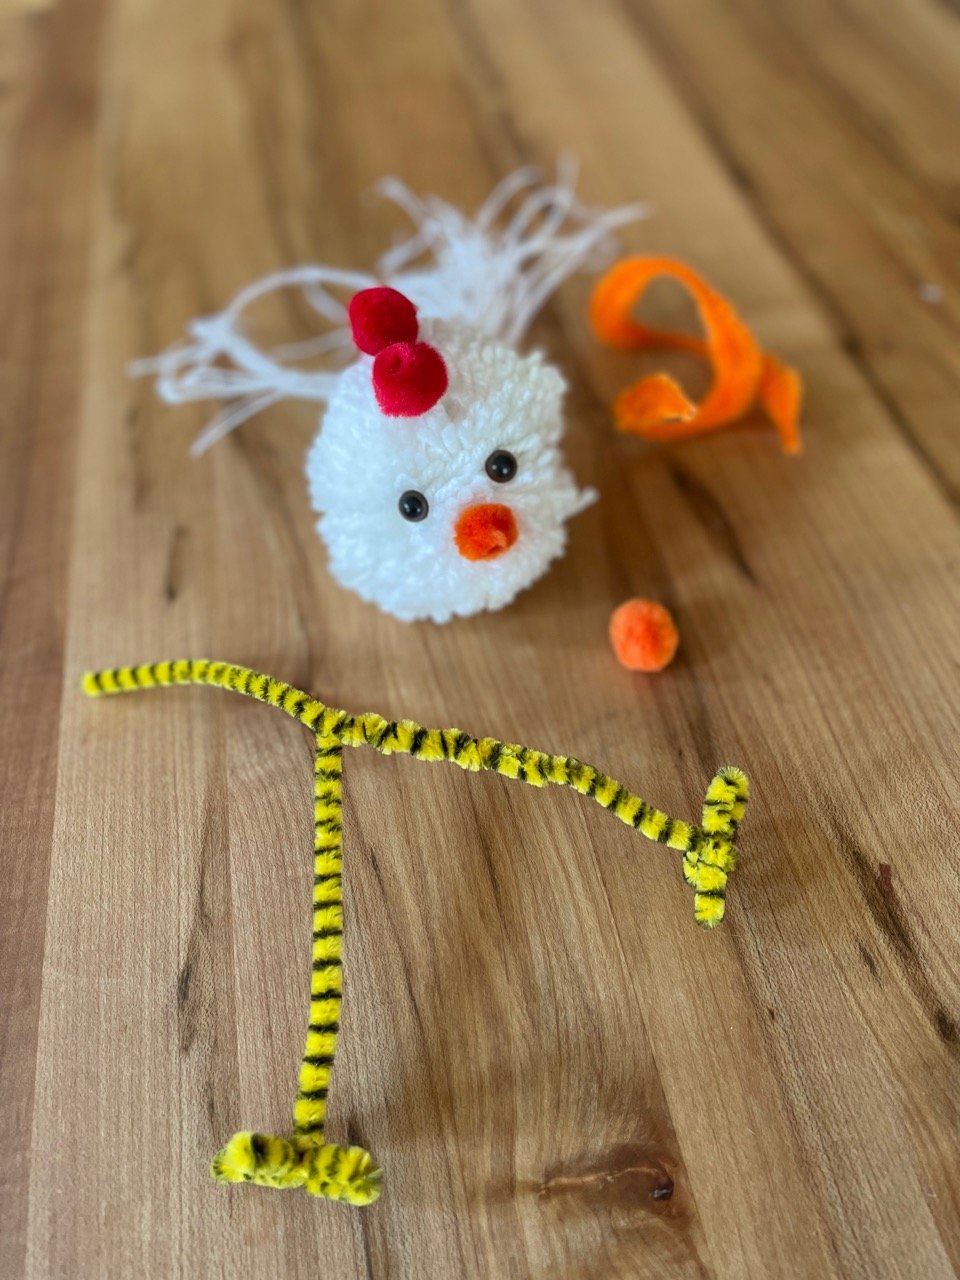
Talk is cheep… pictures say it best: this little one is im-peck-able!

Don’t mind us. Everyone around here is a comedi-hen. The best chicken puns don’t fall far from the poul-tree and we have all been dealing with not one, but several, eggs-istential crises, so we had to get them all in. Can’t wing for losing…
We’ll show ourselves to the eggs-it…
this IS a spring chicken
Adding handmade Spring decorations to your home or someone’s basket is easy and fun! Use homemade or purchased yarn pom poms as a start for this simple Spring Chicken.

Small pom poms, which can be made or store-bought, chenille stems or simple wire, any type of eyes— combine to make this adorable little Easter tree ornament or basket stuffer.
We twisted the stems to form simple feet, trimmed a purchased pom into a beak shape —but an end of orange chenille stem would work as well. We added simple animal eyes, trying everything in place before gluing with water-based glue (school glue or tacky glue will work and are not as messy as hot glue).
The stem or wire legs and feet are wrapped around and into the pom pom tightly so that the fiber covers it all around. We added a bit of ostrich feather for a floofy tail.
Tres chic!
Valentine's, Pal O'Mine

Heart it or hate it, the day of Lurve is on the way. You might be celebrating Valentine’s or Galentine’s or Palentine’s, so we have a little “SHOW ME” sesh for making homemade cards that are really cute and truly easy.
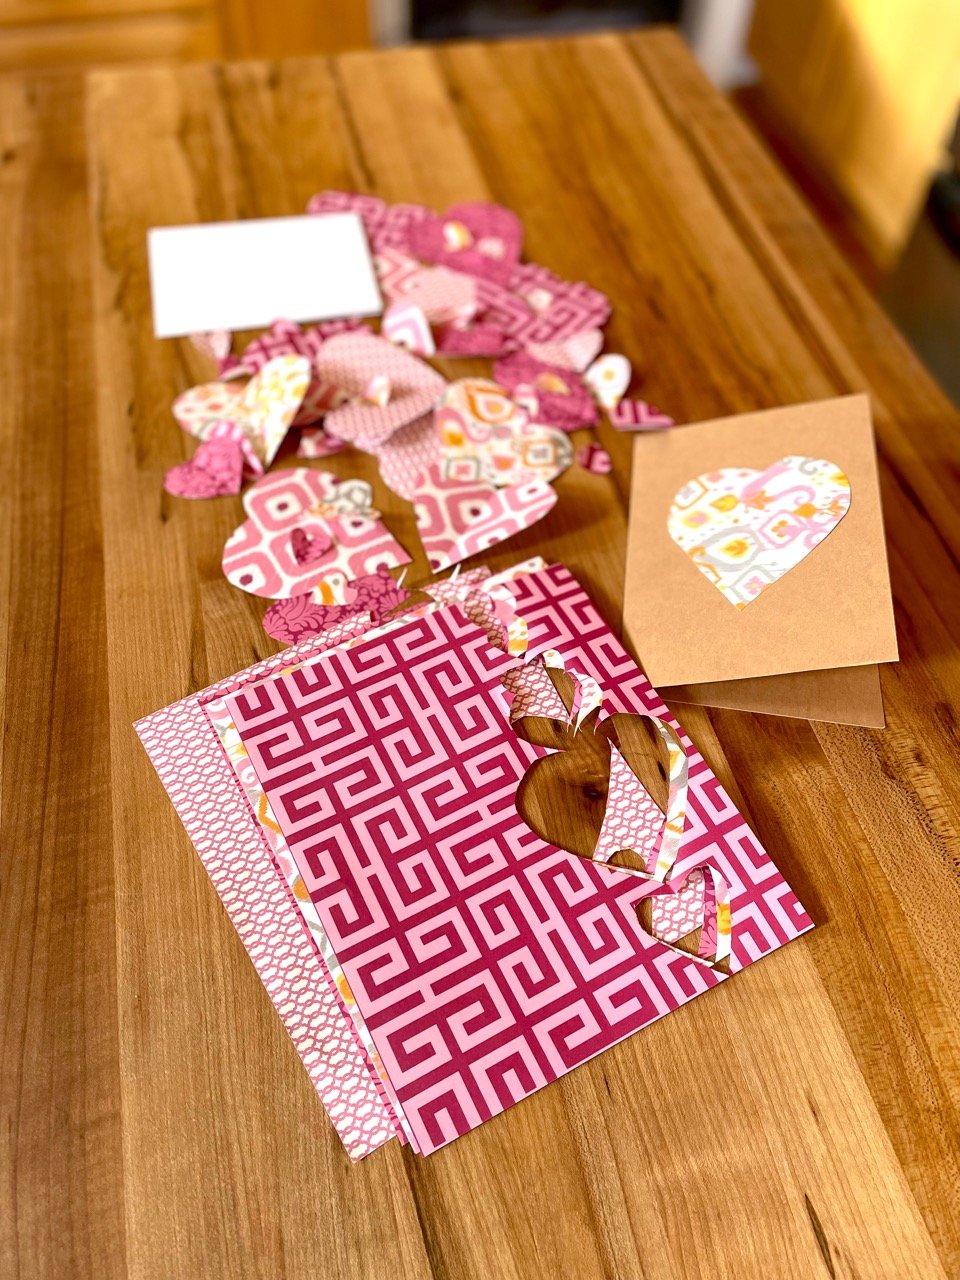
Reuse papers from old envelopes or those stacks of patterns you got that time when you were going to organize all the photos and scrapbook the hell out of mementos… no? yes? no? We’ve given up that idea, too, friends. It’s a GOOD thing.
Take papers of different, related patterns and fold in half. Cut half-heartedly, ah… we mean cut half hearts… along the folded edge such that you end up with a little pile of heart shapes in different sizes and patterns.

If you have blank card stock, glue hearts on the fronts of cards. OR create your own cards and envelopes from trusty kraft paper.
We used bits and bobs from the whole process— parts of leftover paper and the negative space hearts left over from our first cuts, which, as we all know, are always the deepest.
Have fun! Lay out hearts and pieces in different configurations, balancing patterns, values. It is A-Okay to just glue one heart on each card too! It’s the love you are sending, not the art.
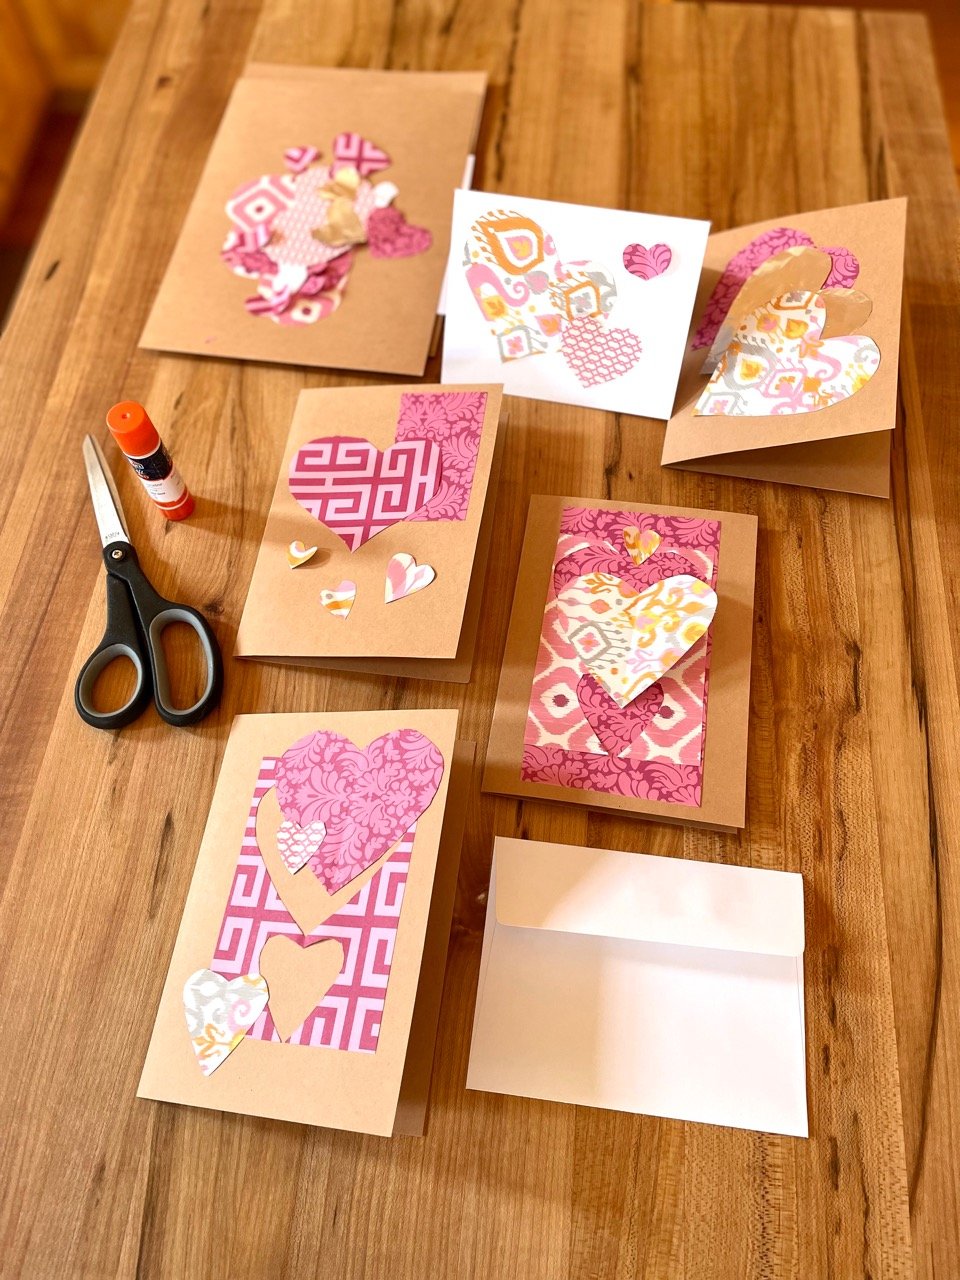
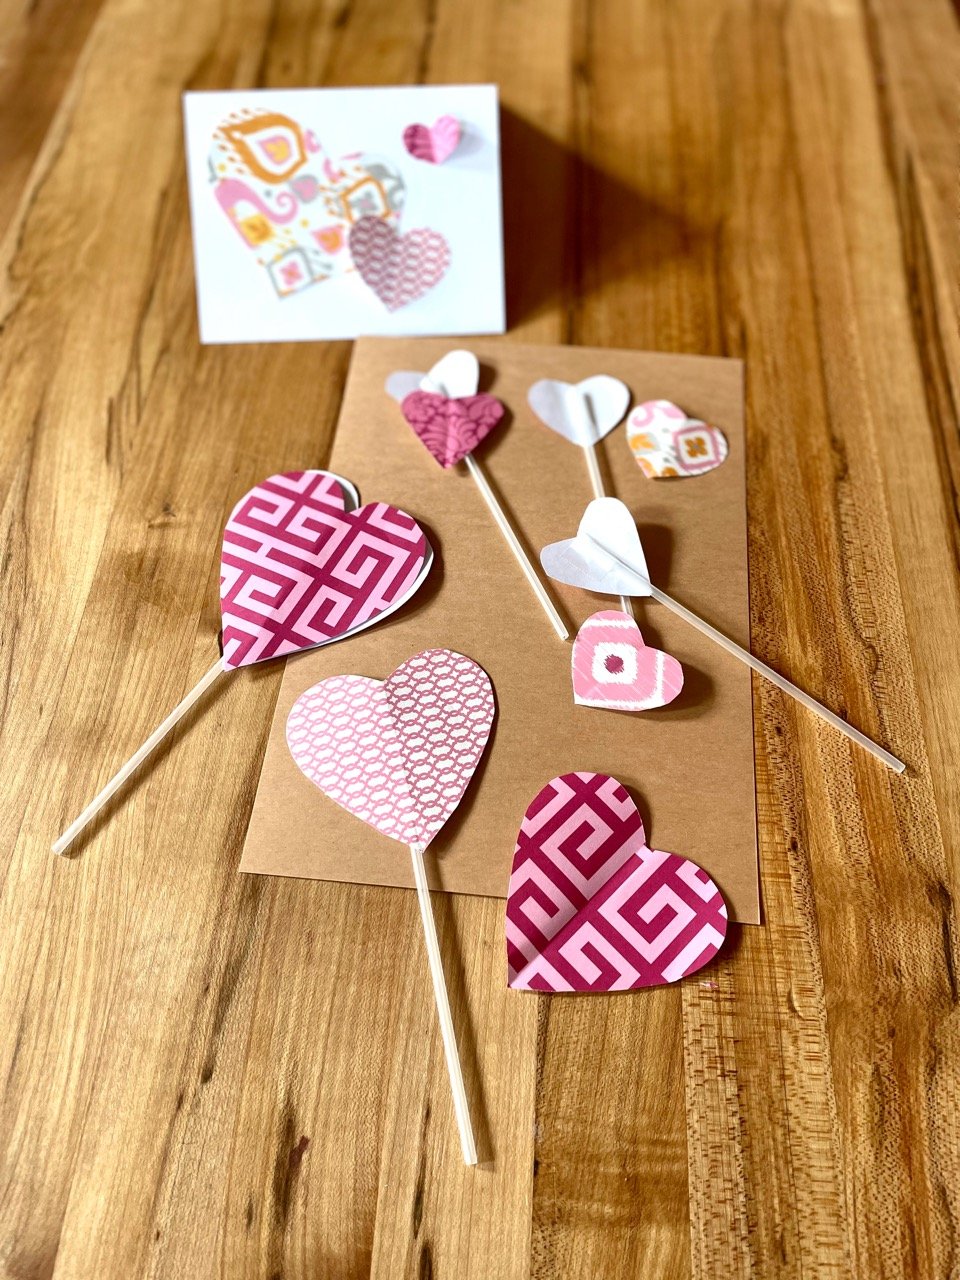
We are playing with 3-D pop-up effects as well. Pop-Up cards are a top trend…. but more on that in a bit.
Whatever you do, make sure you put on enough postage, especially if your envelope is a non-standard form. Last thing: S.W.A.K. (seal it with a lick, because a kiss won’t stick!) Lil bit gross, but goes right to the 9-year-old in you, doesn’t it?
hat ornament upgrade: gnome big deal

We are always learning, ya’ll. Sometimes the same lesson over and over! It took a bit of time to create the hat ornament from leftover and recycled materials. We have illustrations below on how to add on elements to create a jolly little gnome.

Perusing the wider webs, we saw so many examples. Gnomes are in! We saw some that were really adorable — and crazily “affordable.” Hard to resist absolutely adorable ornaments for $3. But the real costs are actually higher. Made us think we could not or would not work for such a low return on our time and materials, but somewhere someone has to do so.
Please, all, take a moment and contemplate how little workers everywhere are paid! Work towards changing the corporate approach to labor and supply.

Gather wool roving, cotton fluff, or any fuzzy bit for a gnome beard. Felt up wool roving into a ball for a nose, or use a standard commercially available pom pom.

Use tacky glue, white glue, or hot glue to secure the beard to the inside of the base of the yarn hat ornament, and the felted ball or pom pom to the front just above the beard. We secured the ball and beard with cord for extra stability. Then we added a nice Brooklyn groomed mustachio for extra panache! Go big or go Gnome, right?

clever no-sew hat ornament from leftovers

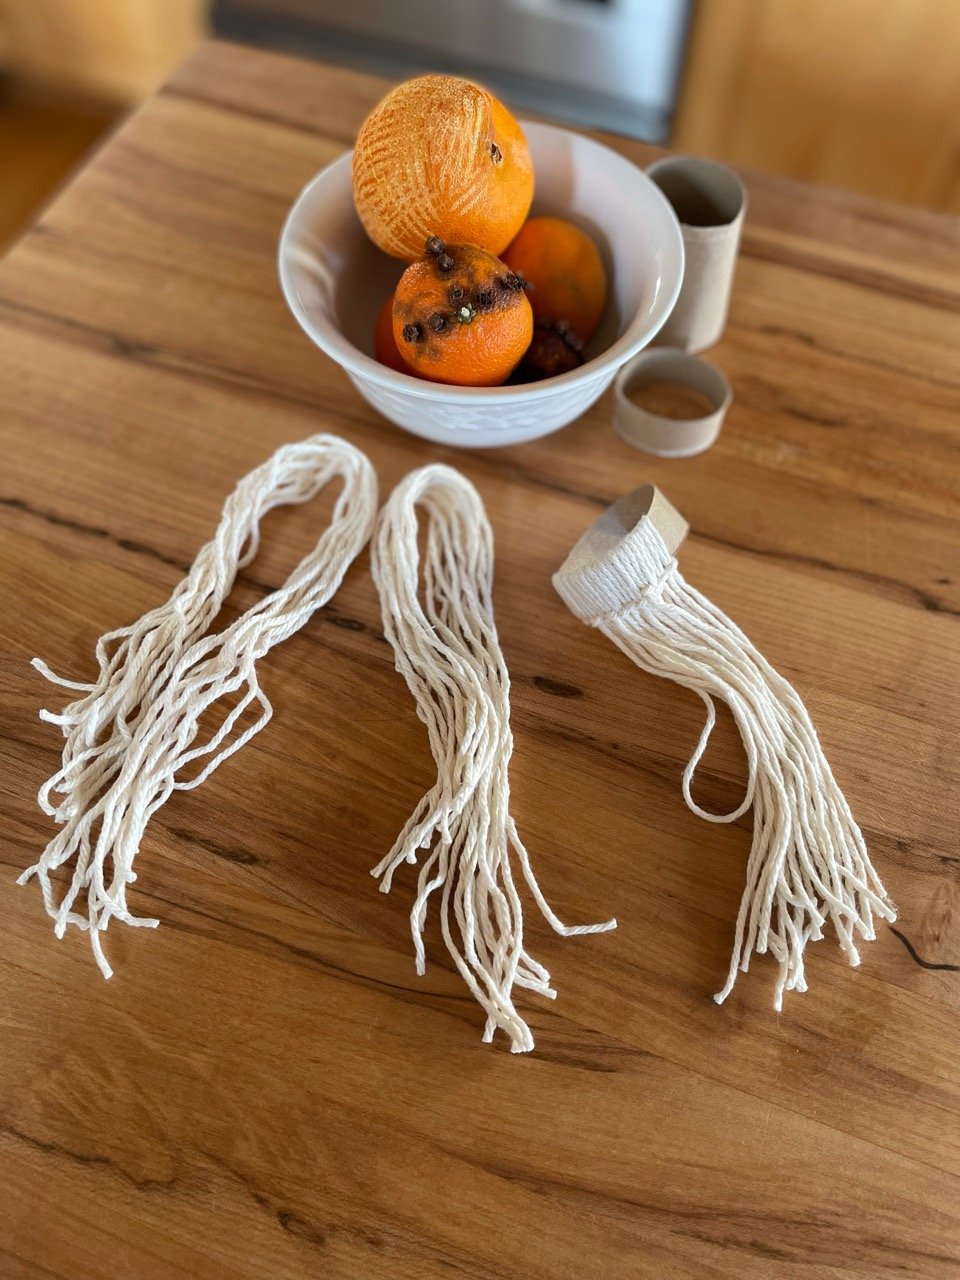
If you have learned one thing about us, it is that we are going to reuse the HELL out of the contents of our recycle bin— especially the cardboard tubes from toilet paper rolls. After all, they are a constantly renewing resource! We saw various posts for adorable hat ornaments made from leftover yarn or string and parts of toilet roll tubes and thought we would give it a go.
Gather materials:
yarn or string— preferably thick enough to grasp easily and cover the cardboard
scissors
toilet roll tube
some bit of time— this takes more time than it looks!

Cut toilet roll tube into approx 1-inch sections. Cut lengths of yarn into 10-11 inch segments.

Fold lengths of string or yarn in half, then wrap the loop formed at the halfway point over the top of the cut section of toilet roll tube. Slip two ends of yarn or string through the loop such that the knot formed snugs up against the two tails at the base of the tube section. This is called a “Larks Head Knot.” Looping the loop over the back and pulling the tails through allows the two sections to lie flat in closed lines. If the knot is tied incorrectly, the lines will be divided and open. Correct ties are shown on the left of the tube. An incorrect tie is illustrated on the left of the picture above.

Correct formation of the Larks Head Knot for this project shown above!
Using a approximately equal lengths of yarn or string, continue tying knots until the tube is completely and snuggly covered.
Once the the tube is completely covered, you either have the beginning of Cthulu, which is a great way to go, if you have a mind… or the next part to the hat.
Hat?
Ok.
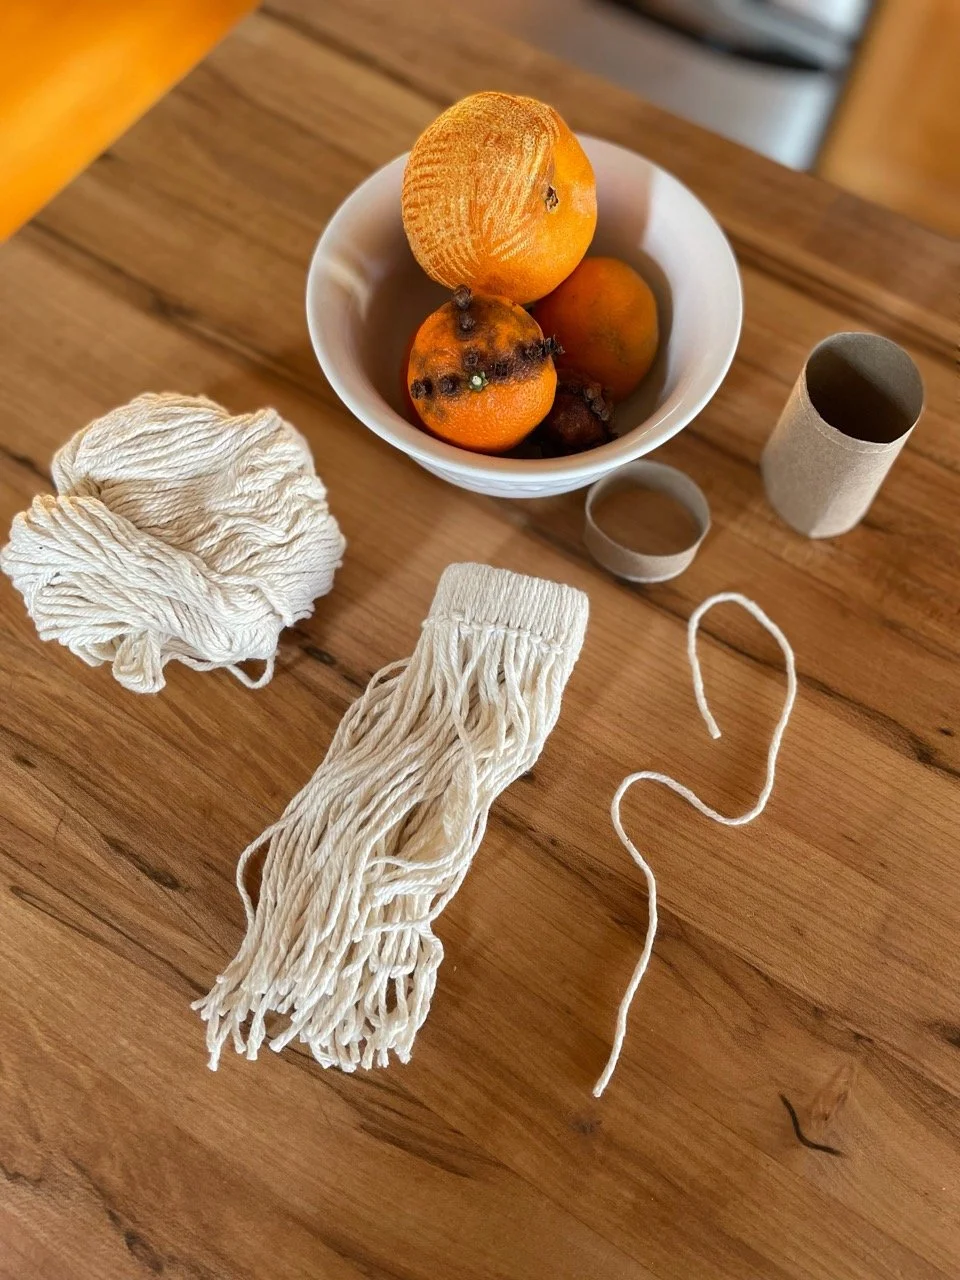
Push all the lengths of yarn through the tube, out the top (opposite the knots) and straighten. We know… Cthulu STILL a possibility! But, onwards.

With a length of matching string or yarn securely tie the gathered spaghetti monster…er… strands into a cinched area about hat height from the toilet roll tube brim.

We wrapped twice securing with a non-slip knot like a square knot (right strand over left, then left strand over right).

Using cotton balls, cotton salvaged from medicine bottles, or wool roving, stuff the inside of the hat form.

Trim the top strands to a pom pom or tassel shape. Add a bit of string or twine as hanger.

Adorable lil hat on the tree— squeeeee!

gnome time like the present
With time change behind us, looooong evenings ahead and certain holidays zooming up quickly— uh hum... we are looking at you, Christmas train— we are taking some time to do small, manageable projects. In order to speed up the process, thereby MAKING these project manageable, we don’t start at zero, but utilize bases that are already started i.e. upcycle readily available decor, but add better materials, or personalized finishes. For example, these thrifted gnomes followed us home and we set to work reusing a much loved, but timeworn sweater to improve their looks.
It’s fun to get something done in an afternoon or two and points for sustainability as well!!

We started by removing as much of the polyester fluff from the thrifted gnomes as possible. Using the existing gnome, we drew a simple pattern on a scrap piece of fabric and set to work. When reusing old sweaters, we prefer real wool or animal fiber, though any type will do. However an animal fiber sweater can be tightened up or felted if it is washed and then tossed in the dryer. This process expands the scales on real wool, helping them catch together, closing openings — or choose one that has already been through that process inadvertently… not that YOU put sweaters in the wash by accident…
We lined the sweater we chose to use with lightweight cotton fabric so that we could speed up the process with a sewing machine. Lining knitwear, especially loose or loopy knits, prevents yarn from catching on the presser foot. All of the sewing for this product can be done by hand with a tapestry needle if you are not proficient with a sewing machine.

In order to cut the sweater arms into gnome legs, we ran seams along a central line — then carefully cut each sleeve into 2 tubes by following the red line in between the sewn seams. Presto! Instant wooly gnome leggings!

In the narrowest portions of the gnome outfit, we clipped the lining at the finished seams to make turning the legs and arms right-side-out and fitting them on the gnome body a little easier.

Lookin’ a leetle creepy there, upcycled sweater parts…. but it gets WAY better!

Choosing some fun leftover yarn— any type, color, or texture will do— we made the SIMPLEST yarn gnome beard ever!! You may have bits of faux fur or alpaca or wool roving or goat hair or cat hair — whichever. Have we mentioned we are not judge-y? We are NOT judge-y. But for these gnomes, we circled the base of the hat with red trim — but could have used rope or twine — and tied on lengths of yarn by checking the length of desired hair or beard, doubling the yarn before cutting, making a loop at the top of the double yarn, placing the loop over the trim circling the hat, and then pulling the two strands of yarn through its own loop and pulling up on the strands until the loop is tight. We have heard it called a "lark’s head knot” but we call it “two strands through a loop thingy.” Po TAY to. Po TA to. Vodka. Whatever works.

Repurposed sweater cut and sewn and gently tacked to repurposed thrifted gnome. Please note the fuzzy bottom of thrifted fellow— tacking on a patch cut from the sweater completes the matching pants. Reusing an existing form, but changing the finish cuts this project time in half!

Mister and Milady, Jingle and Jangle, Him, Her, Them… they are complete!
meant to bee

While we are not fans of time change, early in and out of the chilly darkness, DOES mean it's time for small projects that can be done cuddled up with a blanket on your lap! These "gathering wool" sessions are for a purpose... handmade ornaments are lifetime keepsakes. Knitted, crocheted or felted wool are some of our favorites— but they could be quilled or cut paper or wire and beads!
Here is a knit bee from a Claire Garland pattern available from her website or on Ravelry.

Claire Garland has tutorials available for her techniques, so knitters with basic skills can learn new ways to create for charming results!


Little projects are a nice relief from a long knit, use small amounts of yarn, and building new skills is so satisfying. We really love the lifelike results... bee happy, friends! 🐝

Needle felting wool is another way to make easy, manageable projects like personalized ornaments from sustainable materials.
diy on a dollar: fall leaves
Another sustainable seasonal idea: Upcycle paper grocery bags into colorful Autumn decorations.

Cut open a grocery bag and fold accordion style. Use stencils, trace real leaves, or, heck, just take a guess! Then cut out multiples to scrunch and crunch around centerpieces, use in wreaths, or scatter on the table.

Use the bottom of the bag as a palette and sponge color onto a few or all.

You are doing DIY on a Dollar! You've got FALL in the bag 🍁 🍃 🍂
diy on a dollar: fall ideas

Dryer vent tube secured with hot glue, painted with acrylic paint. Add leftover faux leaves and/or dried material. Twist of paper and cut grocery bag leaves.

More pumpkin fun with simple, economical materials. Pots migrating inwards after summer? Repurpose them for Fall with paint inspired from vintage cards or felt cut outs — bring on the Kawaii smiles!

Any craft is welcome therapy, especially if the kiddos are involved! Perfection is soooo not the goal... but PROCESS! Much loved pumpkin from preschool days has pride of place.