


fresh evergreen wreath part 1: prepping material
As with any fresh plant material construction, beginning an evergreen holiday wreath should begin with good preparation. Set up work area, preferably with a work surface tall enough to prevent bending down to table level. Unless you are working in a dedicated workshop, securely cover surfaces with waterproof material such as plastic drop cloths or large garbage bags. A turntable or lazy susan is a great way to rotate any arrangement project, but is especially helpful in working each part of a wreath equally.
It is very possible to use fresh cut evergreen branches and wire to create your own wreath, but with so many things vying for attention at this time of year, we happily recommend using a purchased wreath base — they are widely available at garden centers and grocery stores.

We look for springy, fresh branches on these wreaths and a minimum of falling needles. Once home, we dunk the whole thing down into a tub of water and let the branches absorb moisture. After removing the base and allowing a day to dry, we treat the base with a anti-dessicating spray such as the commercially available brand, Wilt Pruf, or similar, generously spraying BOTH sides of the wreath base and allowing it dry. This one step, though not essential, makes a world of difference for evergreens lasting longer, staying prettier, in winters that are becoming ever warmer.
We like to tidy up the purchased wreath bases with judicious trimming and balancing of branches before any decoration begins.
When your work area is set up, the wreath base is ready, gather together your tools of the trade: pruners, snips, wire cutters, scissors.

Don’t forget additional items which help avoid attachment issues: wooden floral picks, green florist wire, twine, and glue gun with plenty of glue sticks.
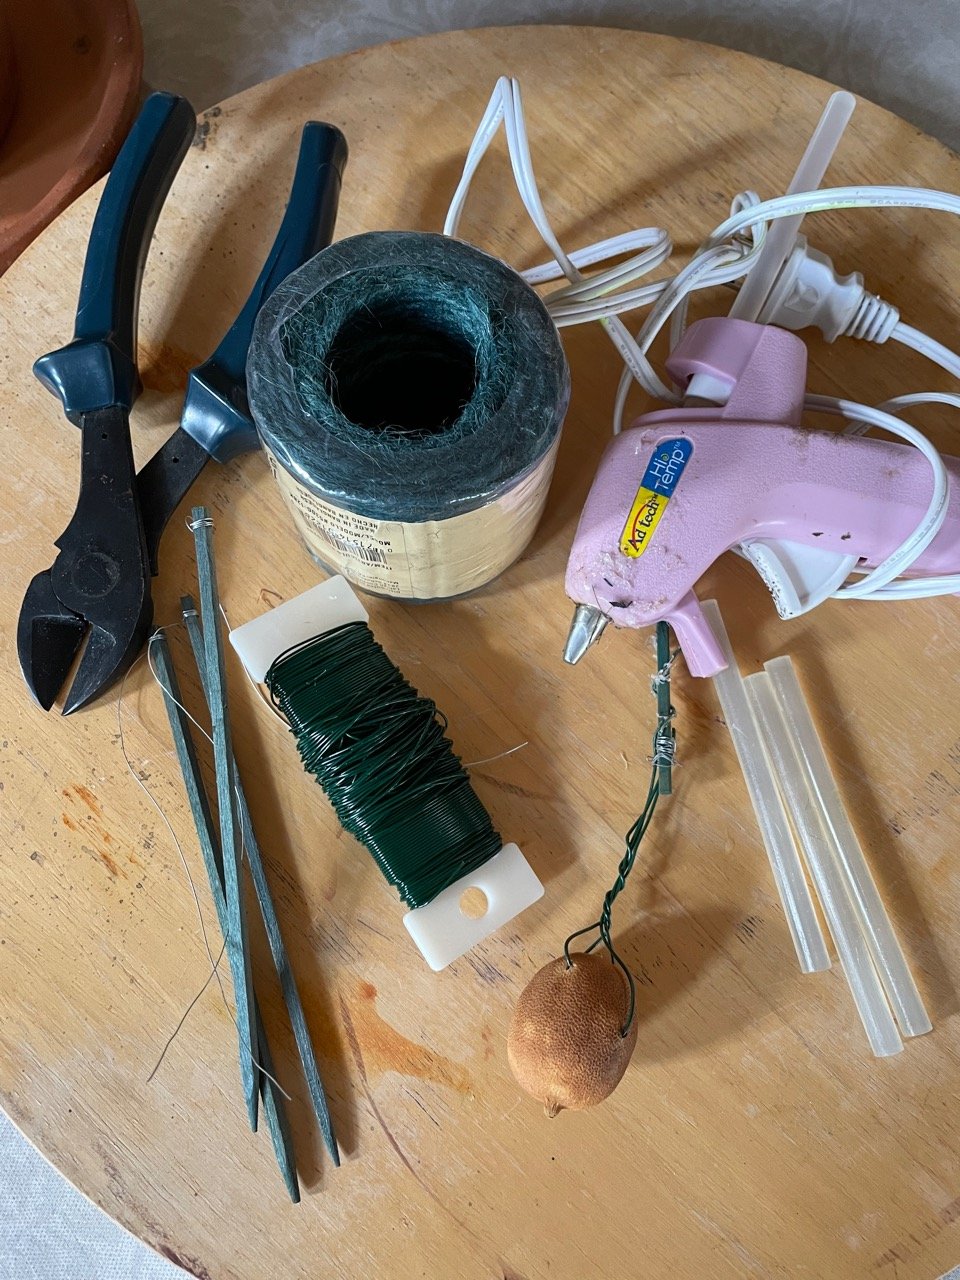
Adding a pick onto almost any element in a wreath provides extra structure for securely attaching to the evergreen branches. Running wire securely through or around cones, fresh fruit, or the tops of ornaments, all help the embarrassment of a wreath yeeting its dec onto unsuspecting guests at the front door.
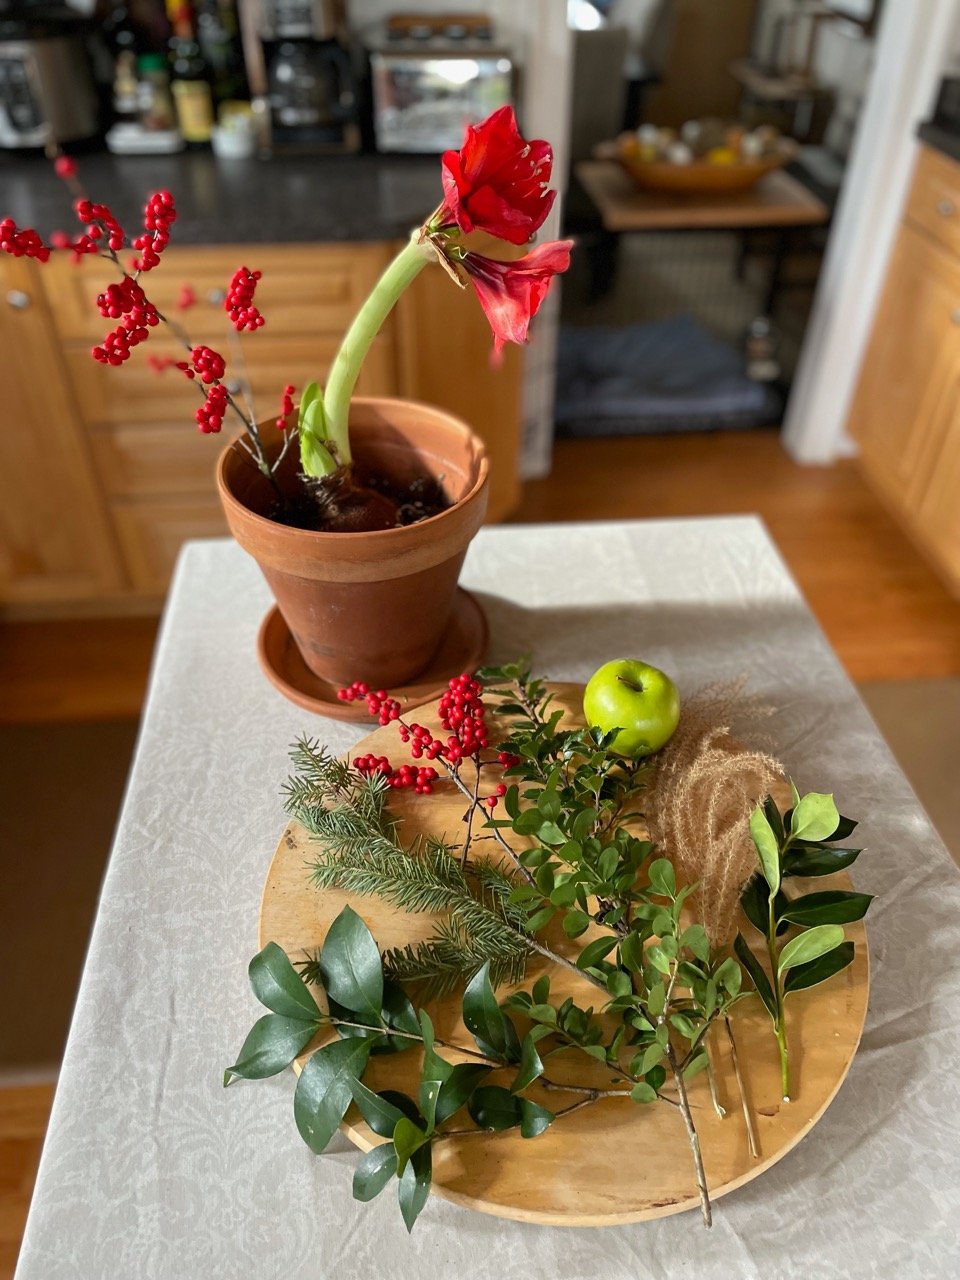
We pick fresh evergreen elements to add to a commercial wreath. Varying the colors, leaf types, and texture adds to visual interest. We use cut-from-the-yard or bought at the garden center elements that have had a day to sit in containers of cool water so they are conditioned (hardened off from a freshly cut) and ready to insert.
Once the base is tidied and ready to decorate, assemble materials to attach. Start with bundles of found or purchased greens wired on picks and then glued at the base. Leave your newly gorgeous green base as is— OR go for something fun and unusual! Eschew the expected! Leave off the ribbon entirely— be bold!
Feathers, twigs, leaves, nuts, grasses...

Varying the sizes or types of similar items is great way to add pleasing harmony.
Wreath dec needn’t be traditional cones, fruits etc. Add a variety of elements tailor-made to your style! Avoid the cookie cutter look by adding in actual cookie cutters, ornaments, beads, baubles, spools of thread, faux fruit or berries, tiny tools — whatever fills out the former store bought wreath with your own personal flair. Whatever you add, just make sure it is firmly attached to last the season!!

life cycle of a centerpiece
Sadly we have all learned this week that we are not saving the planet by switching to aluminum straws and filling the recycle bin… it will take a whole concerted effort on all our parts to move in the right direction. Not giving up hope — nor abandoning filling that bin — but definitely looking for ways to mobilize political action to combat climate change. In the meantime, we are using and reusing what we find at home, in the front yard, and within a short mile radius in order to limit purchasing goods that are created and transported at a huge human cost and worse carbon footprint. Herewith a centerpiece that went to a party, came home to chill with the fam, and will go on to serve yet one more purpose!

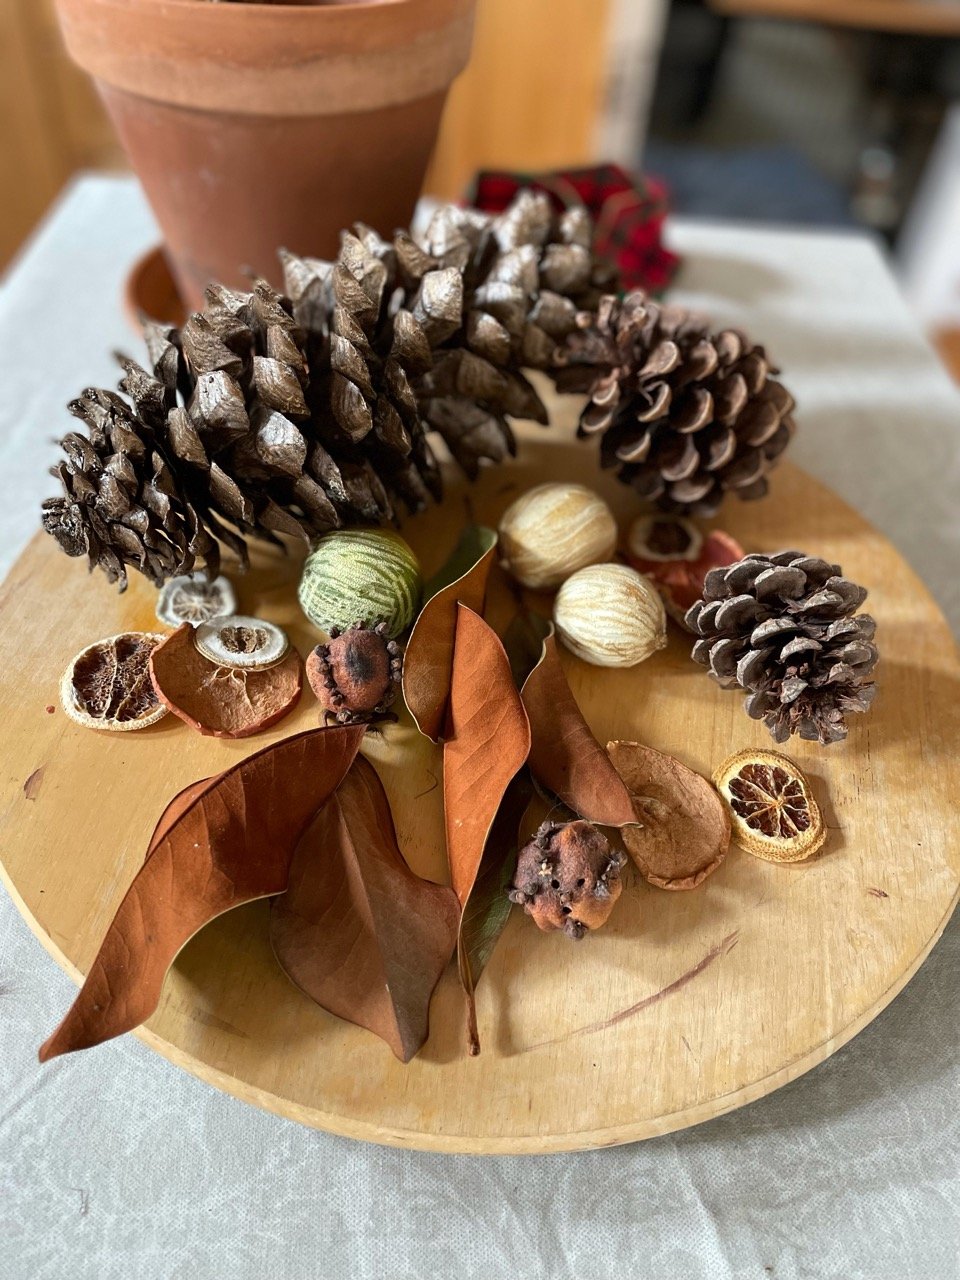
Boasting more lovely toasty tones and harvest grains than a bowl of granola, this sunny centerpiece looks great in copper. We upped the interest by clustering some intriguing fall flavored shapes at the base.

Natural wood tone toad stools and a printed paper Monarch— we think the whole package is the Autumnic bomb.
The next stage in the life of these material will play out as the natural elements dry to a preserved state to be used in the near future!
To be continued…right after we are done phone banking the entirety of Congress about Climate Change.

wreath making: fresh cut from the garden
If fresh decoration is needed for a short term event, a wreath makes a great stand-in for a cut flower arrangement. With a few pieces of equipment, twining together simple greens, with or without flowers that hold up out of water, can be the answer for low-cost, high-impact decor. Of course they look wonderful and welcoming on doors, but can be hung in windows or laid on tables for a bright reminder of the outdoors.
Garden or yard greens and floral elements are fleeting, but allowing them to condition, preferably overnight, in cool water in a clean bucket, should keep them looking good for hours. Some greens from the garden, especially evergreen varieties, can last for several days. We construct our fresh wreaths with a base of evergreen branches. Surprise, you all— “evergreen” does not have to mean spruce, fir, cedar, or pine! Look out for varieties of juniper, cypress, soft hollies, arborvitae, cryptomeria, euonymous, laurels, ivies, and curly privet as some examples of lovely background foliage. If you are in a position to plant these varieties at home, they come in handy for money saving elements for all floral arrangements. Check with your local nursery for what grows best in your area— and try to plant native varieties whenever possible!

After grooming greens, snip larger branches, if necessary, into 8-12” sections. Lay the sections along each other to form a fulsome line. Twist the end of green floral paddle wire at the beginning of a line of branch sections and gently, but securely, wind the paddle of wire around the stems and in between the leaves such that the stems are held, but leaves are not all mashed together.

When ready to assemble a fresh wreath, trim off any discolored or tatty leaves, bare branches or dry areas, roots from ivy, and any really new growth as it will be too delicate to hold up out of water.

Add in sections of branches or stems, continuing to gently wind the wire, until the desired wreath circumference is achieved.

We often include flowering branches such a shrub roses, limelight or other hydrangeas or less tender cut flowers such as rudbeckia, black eyed susans, cone flowers, blue sea holly, lavender, and zinnias.
Once you have the length of wreath you want, lay flowering stems or branches along the leaves as you wind the paddle wire around as you go, securing everything in place. Overlay the two ends of branches and flower line to form a circle. Wrap tightly with wire to hold ends. Cut the wire with wire cutters and twist tightly, bending the wire ends down into the structure of the wreath so no sharp points are left. Check overall appearance. Wire in leaves or flowers wherever needed to fill out less fulsome areas. Don’t forget to add a twist of wire as a hanger!


Mirror, mirror on the wall, who is the prettiest of them all? A wreath that has made a visit to the “ladies” or “gents” or “the bath chamber of the all-thing,” we are all inclusive here… the point is to check out your creation in a mirror. Amazing how our eyes “tire” of looking at any work and a mirror image forces a new perspective and often reveals any deficits that might need amending. Alternatively, take a picture, walk away from your project and take a look!