


floral basics: flower time!

tools needed:
greened up containers
prepped, clean, preferably cool, work area
prepped, clean containers
prepped, clean floral material
buckets as far as the eye can see — or at least several, hopefully in different sizes
water
sturdy, waterproofed work top
trash container(s)
floral snips or pruners
floral scissors
tools appreciated:
turntable or lazy susan
sturdy riser to get work up for ease of arranging
rubber mat for standing over long periods of time
apron to somewhat protect whatever you are wearing, and to hold snips, bits of wire and your iPod (woof. did we say that?? we are OLD)
fan
cool location for finished arrangements
Flower Time (Yes. Finally.)
Stick in some flowers. Make it pretty. The end.
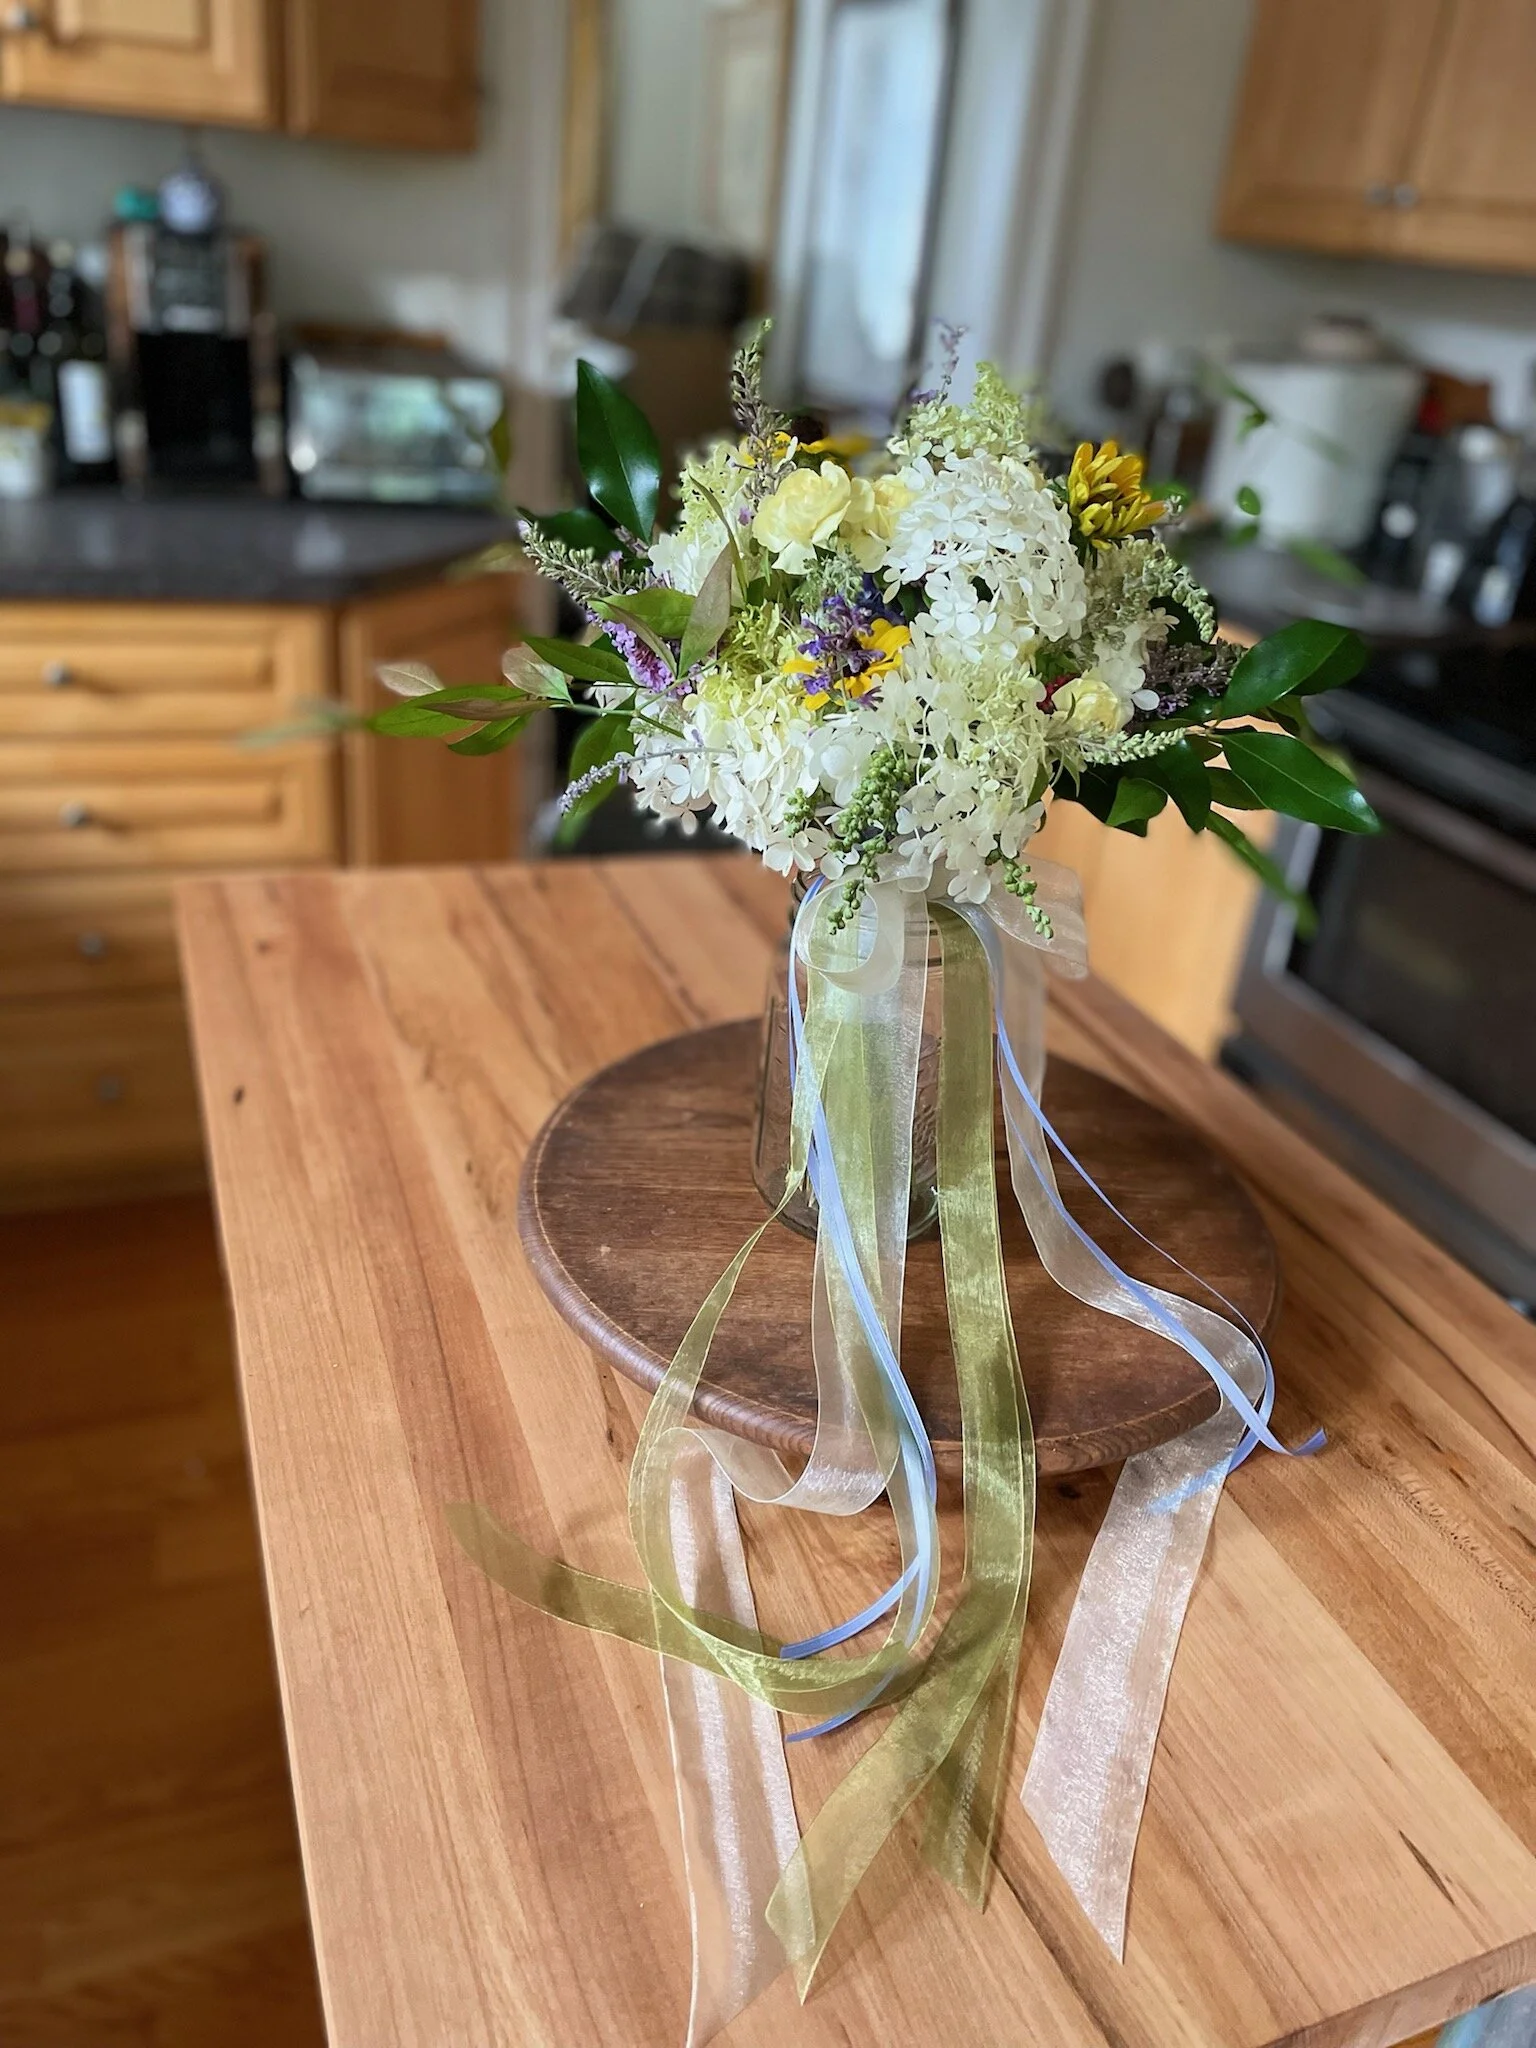
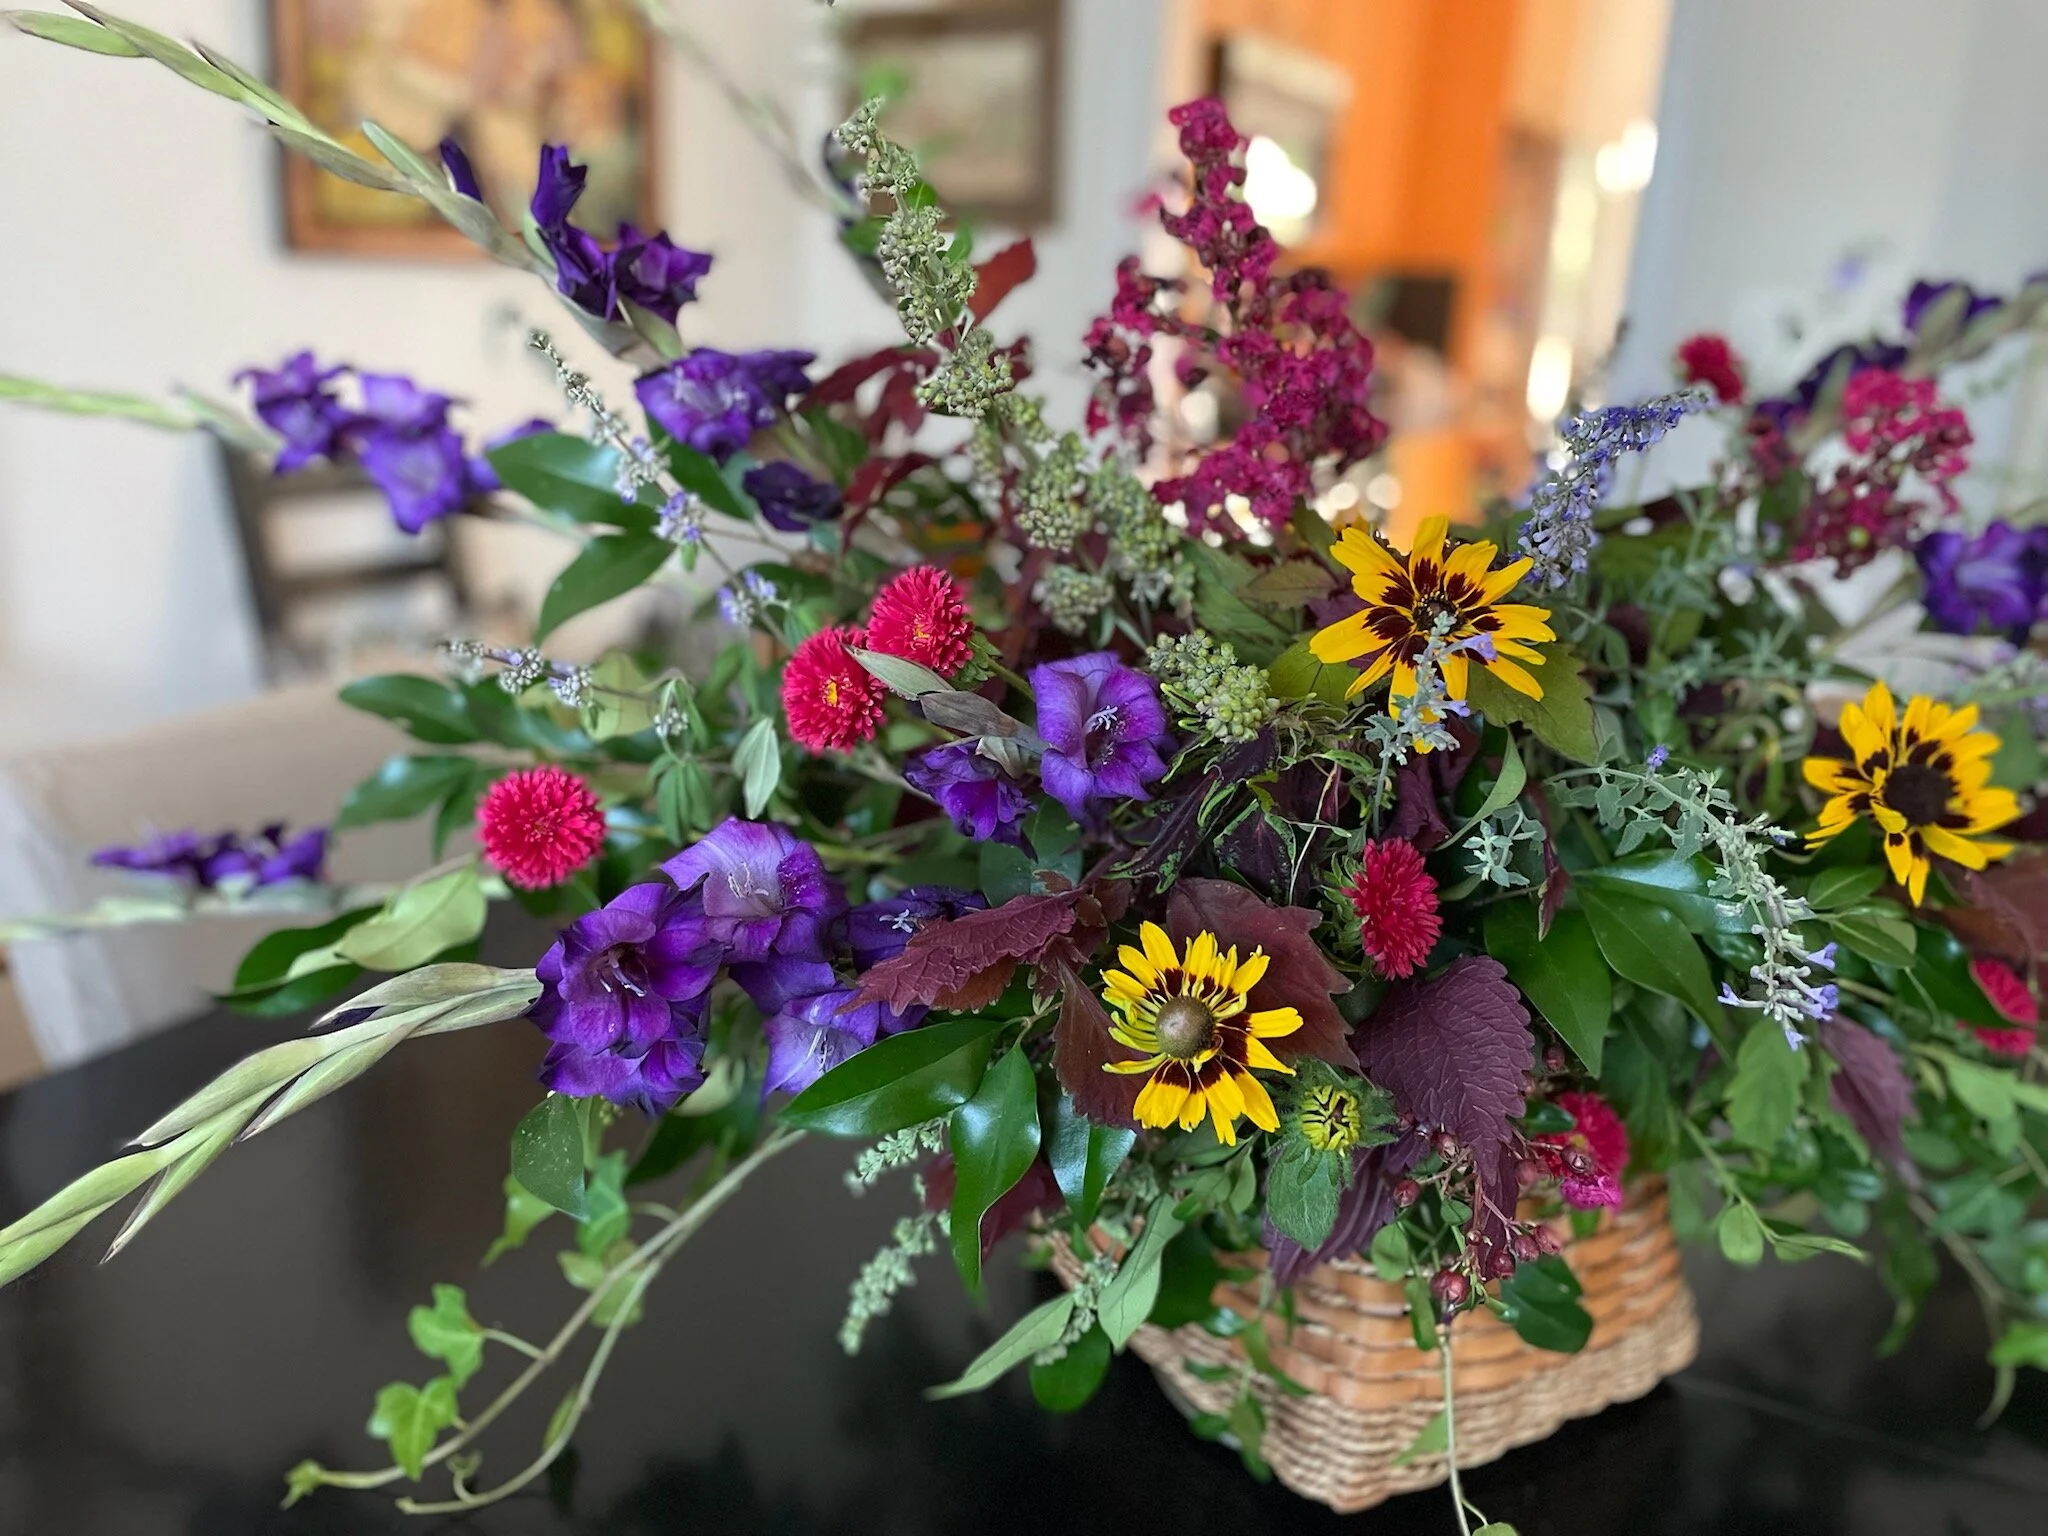
Really? Really? Yes. Well, sort of. If you have prepped everything, kept everything in good shape, divided your material into the correct numbers of arrangements and greened up containers, it pretty much comes down to sticking in the pretties in a pleasing way. We like to put in each element one at time to balance the color and shape in the round, starting with an element that takes up space in a fluffier way like a multi-branched way, then the largest elements such as large roses, dahlias, or hydrangea, and then poke in the single stem fiddly bits to fill the thing out. It is nice to have colors spread evenly around the arrangement, so some adjusting may be necessary. Try not to blob big things together or cut material too short initially so you can readjust the proportions if necessary. Have fun! Of course, strip off leaves and lower growth on stems AND give a fresh cut before inserting. It CAN be more complicated than this, but doesn’t HAVE to be. Flowers make us happy. We have chosen them to ride shotgun at our most joyous and solemn occasions. You get flowers if you win the Kentucky Derby or Miss America or Olympic medals… they are lovely in groups and putting them together should bring joy.
Breathe in. Revel.
Because now you have to clean up, pack up and get these babies to the church on time…
Yikes.
For more hints, check out our other posts on floral basics.


Single flower bunches massed in prepared vases are about the easiest and most cost effective way to put flowers anywhere. You have perfect control of your budget and the time saved in preparation is huge. Masses of single colors can be really effective— or try varying between tables: light pink and dark pink or white and all green.
For more tips and tricks, take a look at our Floral Design and Floral Arranging DIY boards on Pinterest.
floral basics: arrangement prep
tools needed:
prepped, clean, preferably cool, work area
prepped, clean containers
prepped, clean floral material
buckets as far as the eye can see or at least several, hopefully in different sizes
water
sturdy, waterproofed work top
trash container(s)
floral snips or pruners
floral scissors
tools appreciated:
turntable or lazy susan
sturdy riser to get work up for ease of arranging
rubber mat for standing over long periods of time
apron to somewhat protect whatever you are wearing, and to hold snips, bits of wire and your iPod (Woof. Did we say that?? We are OLD.)
fan
cool location for finished arrangements


Who doesn’t love fresh flowers? They serve as our stand-ins for emotional moments, often speaking when we cannot. Weddings. Funerals. Anniversaries. I’m-So-Sorry-I-Forgot-Our-Anniversaries. Fresh flowers are symbolic of of heartfelt sentiment— and privilege, if we are being honest. They are expensive and we culturally value them more for their fleeting characteristics. They represent a connection to nature: some deep dive in our DNA that wants to wander in flowering fields that have the potential to grow and feed us? Why’s it always about food with us? Anyway, flowers. Part of the appeal of fresh flowers is their very evanescence. Their beauty is temporary. Their time with us short. They float through our days with scent and color and are prettier because they are temporary. Let’s explore some tips and techniques to extend the stay of these lovely, but temperamental guests, shall we?
A word about floral buckets.
While it is really helpful to have the actual tall vase shaped buckets that professionals use, it isn’t strictly necessary. The shape of floral buckets —narrow at the bottom, wider at the top— does allow flowers to fan out and have more room while the tall height of the bucket fully supports long stems, any large bucket, preferably taller than a mop bucket, will do. Cleaning out buckets before use is really important to keep flowers fresh. Always let them dry THOROUGHLY before stacking unless you place something in between to keep buckets from locking together as they dry. We know from sad experience that no force on earth is strong enough, no curse words vile enough, to separate buckets that are vapor locked together…
If you are working on a single arrangement: joy, joy, joy! No need to read the following about portions. You can use ALL OF THE THINGS!
Portion Control
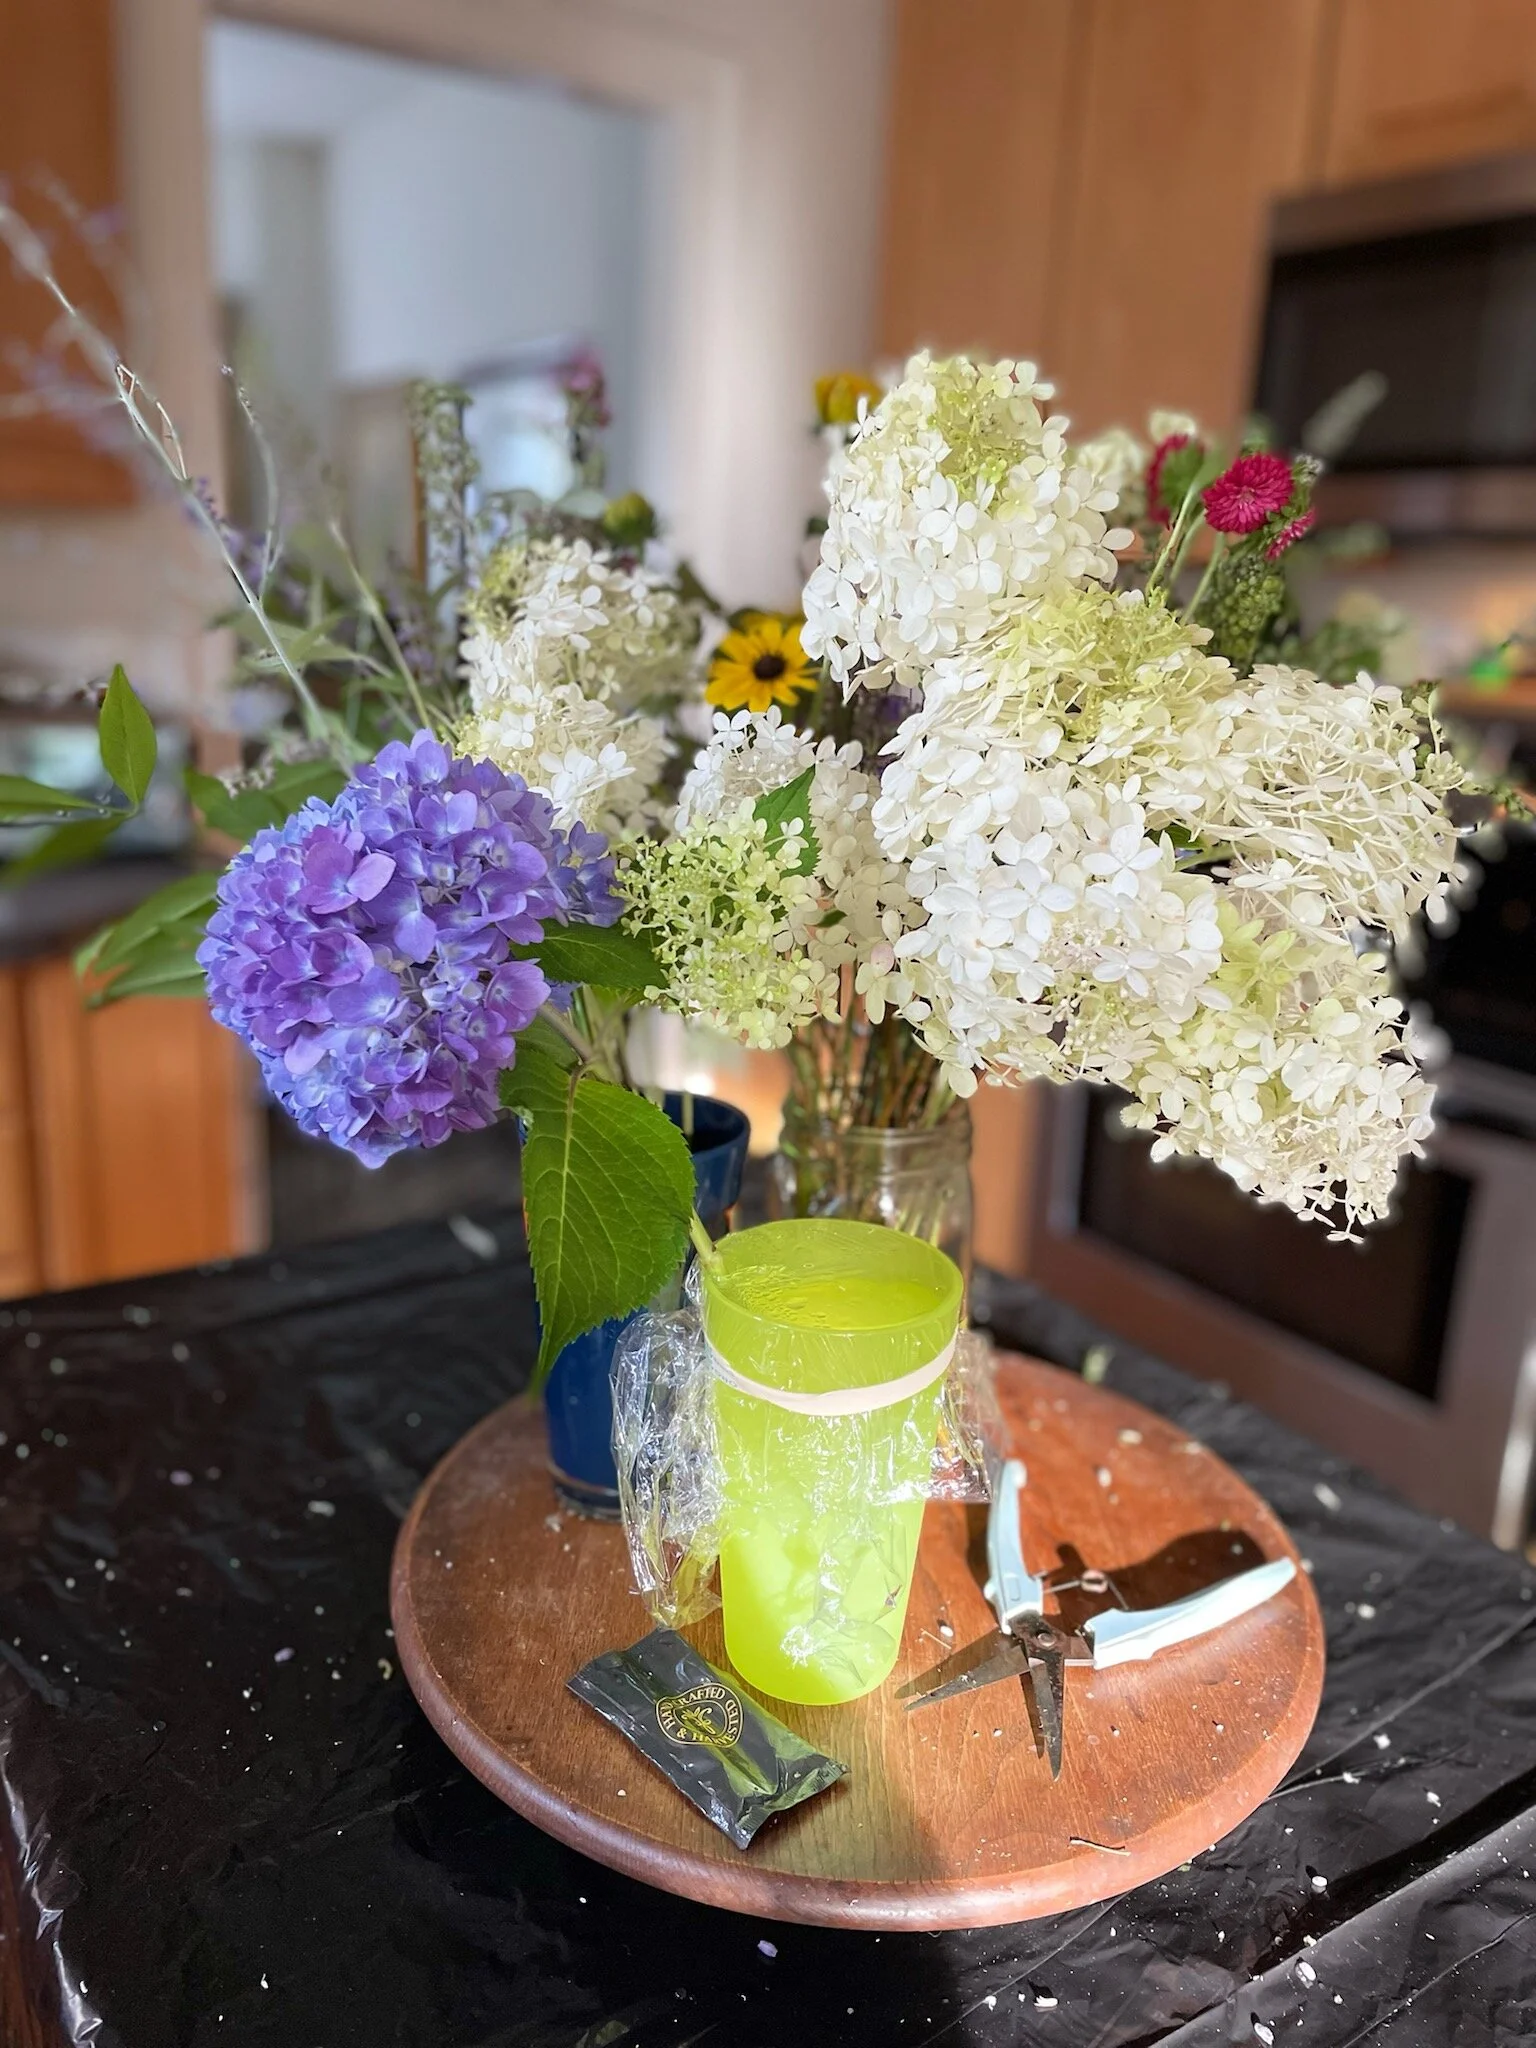
So, you have everything clean, prepped and have set up a good work area. Now you can start arranging, right? Not so fast, friend. The next step is to apportion your materials so that you have enough floral bits for each element! It is simply the worst, if not disastrous, to have 12 table arrangements to complete and, in your happy enthusiasm, you have used up everything by the tenth. So start off by placing the same number of elements in separate bunches (in separate buckets, if you have them). Seven stems alstroemeria, five stems spray roses, five stems veronica, three stems large roses, nine stems of greens etc in each bucket or loosely tied bunches in water times the number of elements needed PLUS —and this is important— some stems of each flower and green into a spare bucket that serves as a rescue resource if something fails, wilts, or falls off along the way!

Buckets of spares, to the rescue!
Wholesale flowers are sold in bunches. If you are ordering from a wholesaler or large retail outlet like Costco, ask how many stems in a bunch. The online resources certainly tell you. A preeetty firm rule of design is to use odd numbers for a better balance in each bouquet or arrangement. The Rule of Threes… it’s a THING. Look it up!) It may work out differently as things go along, because that one spot in a bouquet just needed a bit more blue. The Design Police are NOT going to come get you if you have six veronica flowers in a bouquet rather than seven or nine. Probably.
Multiple arrangements are best done starting with an example and following from that. Keep the example where you can see it as you proceed to make it easier to copy. Hopefully not FULLY copy, but keep similar. We always say they needn’t match, but should look like they are going to the same party.
Some designers prefer to green up all the containers first and then go through and add floral elements. Some prefer to do each arrangement or bouquet from start to finish. We get bored between putting in one earring and the next, so we switch back and forth betwixt and between. Find what suits and go forward!
Now can you do flowers? No.
Greening Up
Greens— from ferns to eucalyptus to leafy wedding table runners (Smilax when you say that, people) — greens are the unsung hero of floral design. Especially if you are on a budget. They are easier to care for, less costly and more likely to “hold up” or stay looking fresh, out of water. They fill in, they cover up and, if properly conditioned, last well in vases or floral foam. If your work area is cool enough, you can actually green up containers the day before finishing with flowers. (A great thing to do before the family and friends come to “do the flowers” for your event… they get a work station with a set up, greened up container and follow the example set for them: 9,7,5,3… hey-ho...countdown to wine and cheese for you and me!)
Work station ready to go!
As you remove branches or stems of greens from their holding bucket, clip side branches for use, strip off any lower leaves from the desired stem length and remove any yellowed or brown foliage. To ensure everything stays as fresh as possible for as long as possible, make sure it has a fresh cut, even if it comes from the bucket the right length to insert.
A variety of greens in arrangements isn’t really necessary, but different shapes of leaves and colors of greens can add to the beauty of the finished piece. Whatever you choose, the first job of any green is hide, or mostly hide, mechanics of the containers. Place your starter arrangement up a bit and insert stems of greens such that leaves drape down to hide any waterproof tape and the edges of foam if you are using it. Once the edge of your vase or container is ringed with leaves, use taller stems to define the shape of the arrangement, whether it is round, tall triangle or the newly popular Hogarth curve where floral material swoops up and down in an “S” shape above the container. Loosely fill in the foam or vase so that the arrangement appears leafy but not so much that there is no room for the flowers!

Budget savers: Greens are so much more affordable than fresh cut flowers, consider using mostly or all greens for your event. Consider looking into local gardens for the privilege of picking. Learn how to pick so it doesn’t look like you have been through— a here and there approach, rather cutting a swath from one side. Choose plants from a garden center from which to cut —judiciously— and plant them for yourself or others. (gifts for the wedding party?) SPING! If you are in the business: If you have the space, grow your own over time. Reliable plants out in the yard are a lifesaver and money maker!
For more tips and tricks, take a look at our Floral Design and Floral Arranging DIY boards on Pinterest.
floral basics: container prep

tools needed
sturdy, clean, waterproof container or vase
waterproof tape or wire for securing floral foam to container
wire cutters
sturdy, protected, waterproof surface on which to work
tub or bucket for soaking floral foam blocks
water
tools appreciated
turntable or lazy susan
riser to raise work up for ease of work
actual long spout small watering can
What is a riser?
A riser is anything that raises your work up to a comfortable level. Why’s it not called a raiser? We don’t know, but we are ALL about saving the backs, so raise your work up instead of stooping over it on the kitchen table, mkay? A riser should be able to hold weight and be steady on a surface with a broad top. Vase and containers with soaked floral foam are really heavy. Adding greens and flowers in soaring designs often make those same vases or containers likely to tip over, so make sure whatever you use to raise up your arrangement in the workshop or at the event is up to the job. Having the project at hand up a bit helps with a common problem. None of the equipment or material used to prop up the floral stuff should ever EVER be visible. We are willing to concede that what used to be verboten is current and modern folks put dried flowers with fresh nowadays, but seeing the floral foam or tape or wires are strict no-nos. So look up the skirt of what you are doing and check that all underpinnings are disguised.

What is a turntable?
Not the HiFi old timey record player type, but a good old solid, non-tippy lazy Susan. Often found at thrift stores for reasonable sums, these table top relics for the 70’s breakfast table are often solid wood and make life easier when arranging flowers. It is a lifesaver or strength saver to be able to twirl your work around to work all sides and make sure all the gaps are filled, all the looks are balanced. Try doing a Christmas wreath on a turntable— magical! Twirls like Ginger Rogers, we are just saying.

riser with turntable
Flowers in water vs in floral foam
Floral foam such as the commercially available brand Oasis is honestly great for flowers at events especially if the arrangements are large. The stuff holds water like a two hump camel and stands up to a lot of material. If making large arrangements, there are all kinds of ways to support the soaked foam so that it won’t crumble or can be pieced together. We absolutely love it. Our life in events changed when we discovered the ultra large designer blocks… our fingers no longer shredded from encounters with chicken wire cages…
But there are times when containers with water are called for and can look stunning— so they have their place for sure.
Choosing containers: WATERPROOF
The good news? Almost anything with an opening can be a floral container. Take the ideas you have stolen, erm, researched, and put them into practice! You love the look of vintage tins with flowers? Cool. Line those puppies with well-fitting plastic containers. Spend a little time matching liners to outer containers so that your lovely flowers don’t die on the table after peeing themselves. Place clean plastic liners inside prettier baskets, wooden boxes, vases, pots, etc. You may have to tape a dark trash bag around a liner if the outer container if the liner would be visible— or you may have a quantity of excelsior or moss or other material to disguise the liner… just remember, no visible underpinnings!!
Lined pot on riser.
Secure the liner in the container. We want these vessels holding expensive material requiring lots of our valuable time to be practically bombproof. Cuttings of old foam slips down in gaps between container and liner really well if there is a large space.
One of the surprising benefits of using foam versus vases is the advantage for using short stemmed material in foam. If the liner is well placed, a block of foam can be seated 1/3 in the container and 2/3 above it. Yep. That is a lot of foam. This allows shorter material to be used all around the foam surface while keeping the height of the overall arrangement quite generous. This is handy if you don’t have access to tall wholesale flower bunches or are saving money.
(Hopefully you have checked heights and placement for where your arrangements are bound and have picked suitable container sizes. You HAVE checked, right? Truly no one loves overwhelmingly tall flowers, no matter how stunning, on a table intended for conversation.) You have GOT to see our Pinterest board: Nope.
You have acquired gorgeous copper pots but they are large? Excellent. Attach dry foam to the bottoms with clay floral adhesive and raise up a plastic liner or metal liner near the top of your container and use waterproof tape to secure soaked floral foam in that. (Because if you try to fill large containers with JUST wet floral foam? You will have to hire a crew to move these super heavy bits everywhere.)
In fact, if you are doing this more than once, assess every use of foam for how much is really need to keep your arrangement fresh. If it can be narrowed or raised, do it! Always look to cut the weight of arrangements and save on material. Arrange in transportable bits that can be easily packed and assembled on site. Use this trick, people, use it! Your back will thank you.
Prepping containers for floral foam
If arranging in foam, it must be soaked, submerged, for the time needed. If you hurry this process, the foam could be dry in the middle, which is not only bad for flower life, but makes the foam more likely to crumble.
Once the container is lined, trim and place well-soaked floral foam in or on a liner and attach to the container with waterproof floral tape or wrapped wire, if a basket. A couple criss crosses across the foam should secure your working surface pretty well. We always tape the ends on the outside surface, often by ringing the top of the container with the same type of tape so they don’t detach. If you are doing multiple arrangements, get all the containers prepped before bringing in the flowers. Floral foam once soaked, can be watered to keep it full.
Example of liners too tall, too small, and just right:


Prepping vases for arranging
Ack. Sigh. Okay, you don’t have floral foam or want to bother with it.. we get it. It’s just glass. We hatez it. So very breakable… and sharp… and heavy.
Enough whining. Vases are amazing for floral arranging. They are readily available, economical, hugely reusable (SPING!) and the perfect choice if you are on a low budget. Some things to make using them better for your event: think about what can be seen, especially if the vase is clear… think about how to transport sloshing water in fragile containers… and think about not overthinking them.

If you are using vases, stems become more relevant to arranging than working in floral foam. The stems of each element have to reach the water in order for everything to stay fresh, so shorter material is usually out. There is also limited display area for design as compared to foam, so it is often best to think of a vase arrangement as a bouquet set in water. This helps with narrowing the focus of design.
Starting with super clean containers— yes, even cleaner than foam containers where fingerprints don’t usually show-- run a checkerboard of clear waterproof tape across the mouth of the vase so the material will be supported as it is inserted. Fill partway with water and et voila, you are in business.
Dried flowers
Containers for dried material can be prepped in much the same way as for live material with the exception, of course, of not adding water or soaking foam. Floral tape, especially clear, can be criss crossed on the top of a container or vase to help support stems of the arrangement. Dry floral foam commercially available specifically for dried arrangements can be attached to a container. It saves material to pre-cover the dried foam before arranging in moss or preserved leaves or other dry material. It may be necessary to weight the bottom of a container for dried material as it may be top heavy and, therefore, tippy, without the weight of water to hold it steady.

Dry foam, prepped to start.

Dry foam vs. foam to soak for fresh flowers.
For more tips and tricks, take a look at our Floral Design and Floral Arranging DIY boards on Pinterest.
floral basics: setting up
Here you are. You have ignored our sage advice about letting the professionals handle the flowers for your event, or you are just starting out and are reading everything about tips and tricks for better arrangements… So, let’s dive in to “How-to-Floral”, shall we?

Here you are. You have ignored our sage advice about letting the professionals handle the flowers for your event, or you are just starting out and are reading everything about tips and tricks for better arrangements… So, let’s dive in to “How-to-Floral,” shall we?
Set Up
tools needed:
water
cleaning material for cleaning buckets etc
trash bags and/or drop cloths
buckets of different heights and sizes, if possible
water
flower snips or pruners
flower scissors (tie with ribbon so they don’t get confused with ribbon scissors)
stripper for leaves or thorns
water, for you this time. Stay hydrated, friends, this is not a sprint!
patience
Tools appreciated:
gloves
wire cutters so you don’t use your good snips to undo bunches of flowers
first aid kit
commercial packets of flower food
Prep your work space and your material
Best to work in a cool, water resistant, if not waterproofed, environment. Floral work is messy and wet. Buckets of water (and finished arrangements, to be honest, are heavier than you think). Sturdy surfaces are a must. Risers are helpful to bring the arrangement up to eye level and save your back. Turntables (lazy susan to you haters) are great for turning the work from front to back etc to finish it well on all sides.
We cover our surfaces in reusable plastic. Depending on the surface area, sometimes with plastic drop cloths, but often with good old large trash bags that get pulled up and used for clean up at the end of the arranging. (We feel we should have some sound badge or notification that dings when we hit a SUSTAINABILITY hint. SPING! That is the sound of the planet thanking you).
We also use line sturdy cardboard boxes with the trash bags for cutting and leaves as we are working. Once the bags are pulled, we use the boxes to transport arrangements for events. SPING!

As you set up your work area, think in terms of setting up an operating theater. Yes, really. You will be working with perishable, living things and you are about to open up wounds. (Technically, cut flowers and greens are dying things, and you are only staving off the inevitable, but let’s go with the metaphor here). Flowers are fragile and thirsty. Greenery less so, but still needs care. Everything you are using should be clean: buckets, snips, scissors, pruners etc should all be cleaned before you start. (Honest to Pete, if you are doing this more than once, they should be PUT AWAY clean! grumble, grumble).
Ahem. Operating room. As you are creating wounds by cutting into your material, everything possible that causes or exacerbates bacterial growth should be removed. When floral material arrives it should be removed from whatever bondage it has had to endure to travel to you (away with plastic sleeves, rubber bands, twist ties and the like), go in a containment spot and dunked into buckets of clean water, hopefully sorted by type: delicate flowers with other delicate friends, greens with greens, and wooden stems by themselves, etc.


Strap cups together, put in bucket for gathering.

Place cut stems, by type, into divided bucket.
Ideally, all material would get a fresh cut before the first dunking, but it is most important to get stems in water. The next step is really important. It is no fun and takes awhile— but will help your flowers and greens stay pretty for much longer! All the leaves and growth that go below the surface of the water should be stripped off, a fresh cut made and placed in fresh water — hopefully water that has a bit of floral cleaner and/or food from a commercial packet.
This job takes time. If you have a lot of material to work with, it takes a lot of time. Wholesale flowers typically arrive in boxes bunched together by type with really long stems. Grocery store or retail store flowers have already been stripped, cut and prepped so typically need less work, but less is not zero. Stems should be rinsed and any wet leaves or growth removed which will sit below the water line in your receiving bucket, leaving at least 6-9 inches of just stem to go in water. Depending on the variety of flower, the “free stem” might be really long— that’s okay, in fact it is super (see Alstroemeria). You actually want to start with as long a stem as possible.
Greenery, is a whole different category, and, depending on the type, needn’t be stripped quite as severely. Most greens love an entire water bath and can be immersed in a larger tub, to be shaken out and used when called into service— just don’t forget that fresh cut when it arrives and another before being inserted into floral foam or vase.

Snips are your friends. Clean them :)
If you have picked flowers or greens yourself, they require some special attention. We have rushed some retail flowers into arrangements on an emergency basis because they had actually been prepped on arrival to the store. Picked flowers need time to get used to their non-rooted condition. Some may not make it. Best to allow for “conditioning” time for floral material to harden off and overpick to account for wilters if these flowers are intended for display at an event. Cut picked flowers or greens with clean, sharp implements. Cut longer stems than you think you will need so they can be recut and still usable. Try not to pick a lot of new leaf growth (greens that are brighter in color or softer in feel) as these usually don’t hold up well when cut. Try to pick flowers that are coming open and, as tempting as it is, not those that are fully open as they are actually in decline and on the way to being “blown.” Older flowers will most likely wilt faster and not make it to your event. Once fresh flowers are conditioned, it is possible to hold them fairly steady if kept really cool or to accelerate bloom by using warm water and direct sunshine.
Place cut stems in bucket with a little clean, warmish water (you don’t want to shock pores closed with cold water) as you pick. Get picked materials into a cool darkened area, gently rinse off all material, recut stems and place in cool water in clean buckets. Then, let them rest…. see who makes it. Hopefully, you will be greeted with robust beauty when next seen!
Once the stripped floral material is all in buckets, they can rest drawing up water and strength for what is to come— and you should too. Good job. You have prepped your tools, your work area and your material. You are ALMOST ready to make an arrangement!
For more tips and tricks, take a look at our Floral Design and Floral Arranging DIY boards on Pinterest.
styling & staging
Staging is a concept best applied to temporary design opportunities wherein some theatricality is encouraged: property sales or rentals, holiday decor.
Styling is the everyday aesthetic of balanced beauty.
We style things all the time in our lives everyday. It is a choice that brings more calm and a harmonious atmosphere which promotes a more settled headspace. This past year? Well, we did not have Calgon, so SOMETHING had to take us away…
We were home All. The. Damn. Time.

Staging is a concept best applied to temporary design opportunities wherein some theatricality is encouraged: property sales or rentals, holiday decor. Styling is the everyday aesthetic of balanced beauty. Styling is part of staging. Taking the skills used to create warm, comfortable living spaces can be amped up for staging rooms to be presented in sale properties. We can show you how.

Styled mantel. Balanced beauty, but not symmetrical.
We style things all the time in our lives everyday. It is a choice that brings more calm and a harmonious atmosphere which promotes a more settled headspace. This past year? Well, we did not have Calgon, so SOMETHING had to take us away…We were home All. The. Damn. Time.
To be honest, once you get going, it is a bit of an addiction. Seeking a balanced composition in the small affects the large. Then everything exists in a “better” relationship to each other. Except people. People don’t always get it. Our partners are not on board with the “perfect” arrangement of plastic bottles on the vitamin carrel, (with labels, with their shrieking fonts, turned to the back, and tallest at the rear, ‘natch, ) but it LITERALLY causes us pain when the bottles are out of “order”…
Stretching…
Envisioning the perfect calm of Velazquez Las Meninas or Degas’ dancers.
Aaaaaand we’re back.
Styling should fall within the realm of actual living conditions. Objects not on Broadway, but in mostly permanent exhibition behind the museum glass? Well, not really, but you know what we mean! Umbrellas are great to have by the front door, says all dog walkers everywhere but especially in Seattle, but they can be corralled in an attractive container rather will-aye nill-aye all over the floor.
We get asked all the time by folks who are searching for better decor and more peace in their lives if “calm” is equivalent to empty or they ask us while holding an armful of objects while absentmindedly stroking great aunt pearl’s button back chair like an old collie. You know that chair is not going to “live on a farm” if you take it to the share shed, right?
The question we asked, long before decluttering became the hottest new hobby, was “Do you love your things?” — if you love your things, do you want to make your space work for YOU.
Here’s the big thing? It’s not the clutter. It’s how the clutter occupies the space.
Styled “We love our things” vs. Real Life “We love ALL our things”:


Styling outfits— finding the right balance of pieces and accessories to highlight the positive and elide over perceived deficits with the goal of feeling sharp. Check that. Before we stayed home for a year and all we wore were pajamas.

A styled outfit.
Here are some of our styling & staging boards for more ideas: